After a successful login to the management console, the system redirects you to the dashboard. The dashboard has 3 main rows.
1- System Statistics
On the first row, we have the system statistics.
- The statistics include online screens, offline screens, the storage usage for this account, and the licences available for this account.
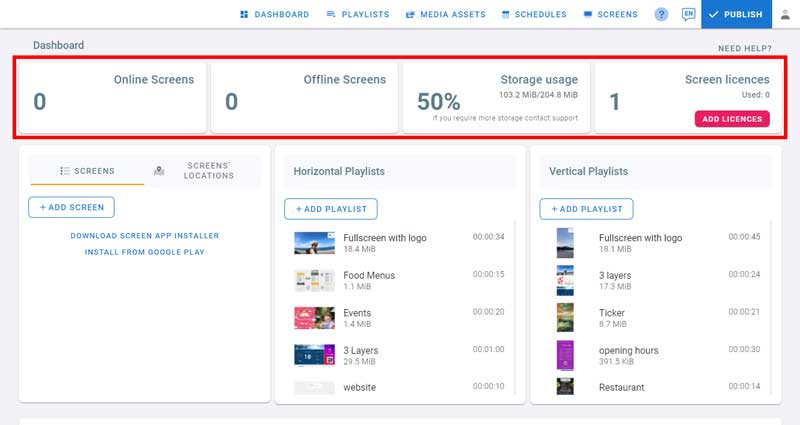
Add licences from the dashboard
- To add licences direcly from the dashboard, click on Add Licences button.
2- Screens and Playlists
On the second row we have 3 sections: The first is for screens, the second and the third section is for horizontal and vertical playlists.
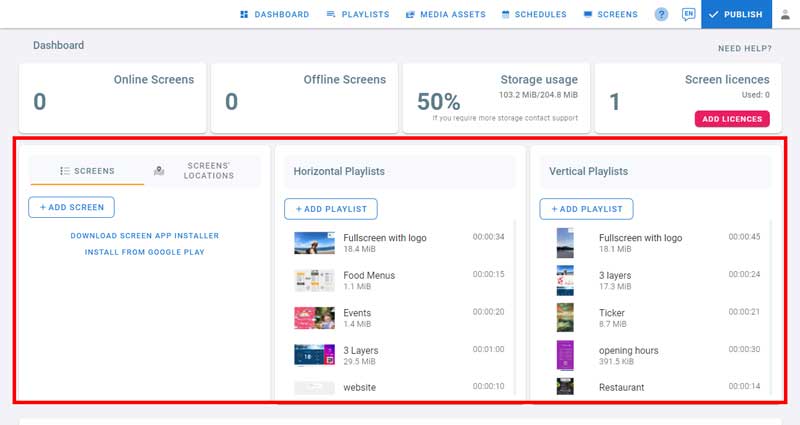
Screens
- Because you didn’t add any screens yet, a link to the player application and to play store are provided.
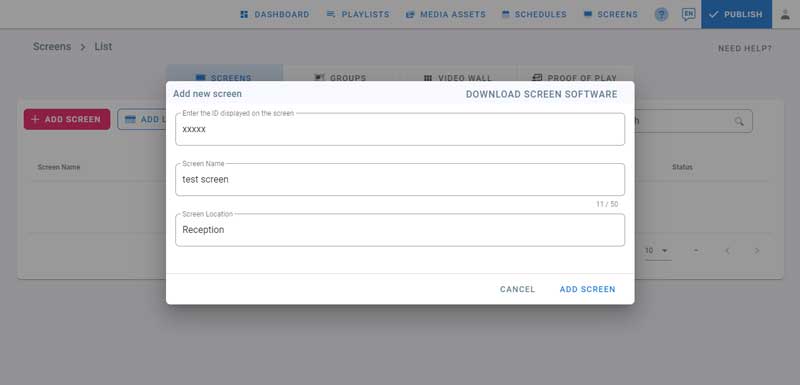
- Check the support guide in the last row to learn how to download and install the application on your screen.
- Once you do, click on Add Screen. This will open the dialog where you enter the code you see on the screen.
- Get the code from the screen and enter it.
- Enter the screen name and location then click on Add screen.
- Now go back to the dashboard.
- You can see the screen we just added.
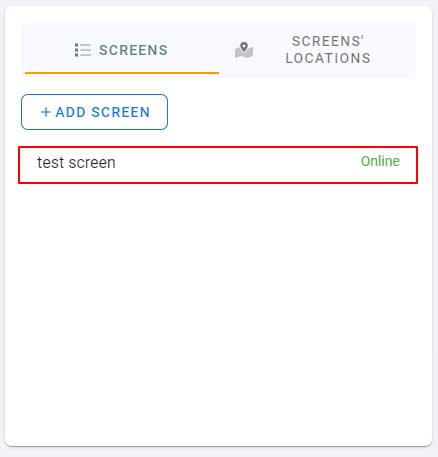
- Click on screen’s location to check its location on the map.
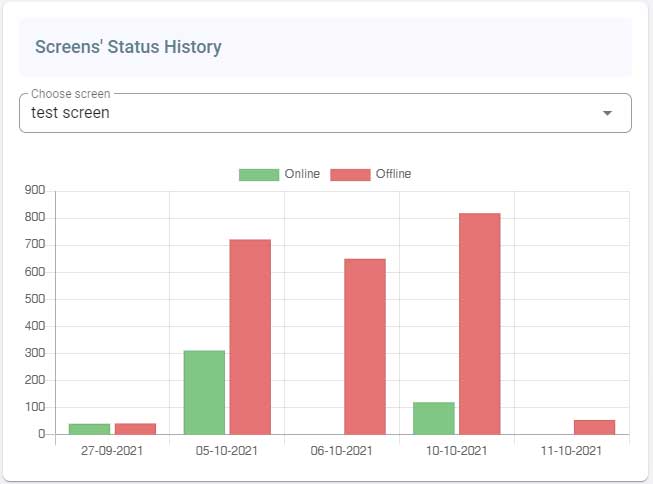
- Below the screens section, you can check Screens’ Status History on this bar chart.
- To do more actions, you can also click on screen from this list. It will open the screens page.
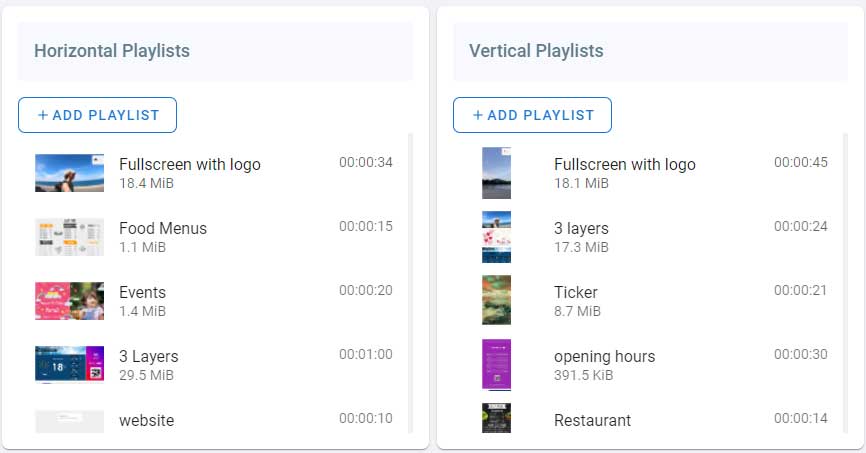
Playlists
- In the playlists section, You can see your horizontal and vertical playlists here.
- You can add playlists by clicking on Add Playlist.
- Default playlists and playlists you create will be listed here.
- To open a playlist click on it. It will open the playlist where you can start adding content.
3- Support Guide
And on the last row, we have the support guide available if you require any help using the system.