Geo-Location allows automatic updates of content based on the device’s geographical location, enabling specific playlists to be displayed in designated areas, regions, or locations.
There are 6 main steps to configure the Geo-location feature:
Step 1. Configure Location Services on the Device
Set up the Location Services on your digital signage device to permit precise location access. This setup enables the app to accurately identify and display your screens’ locations to monitor the digital signage network.
To configure the location servies on your digital signage device, follow these steps:
1- Enable Location Services for the Device
To enable location services, grant the app permission for precise location on Android devices.
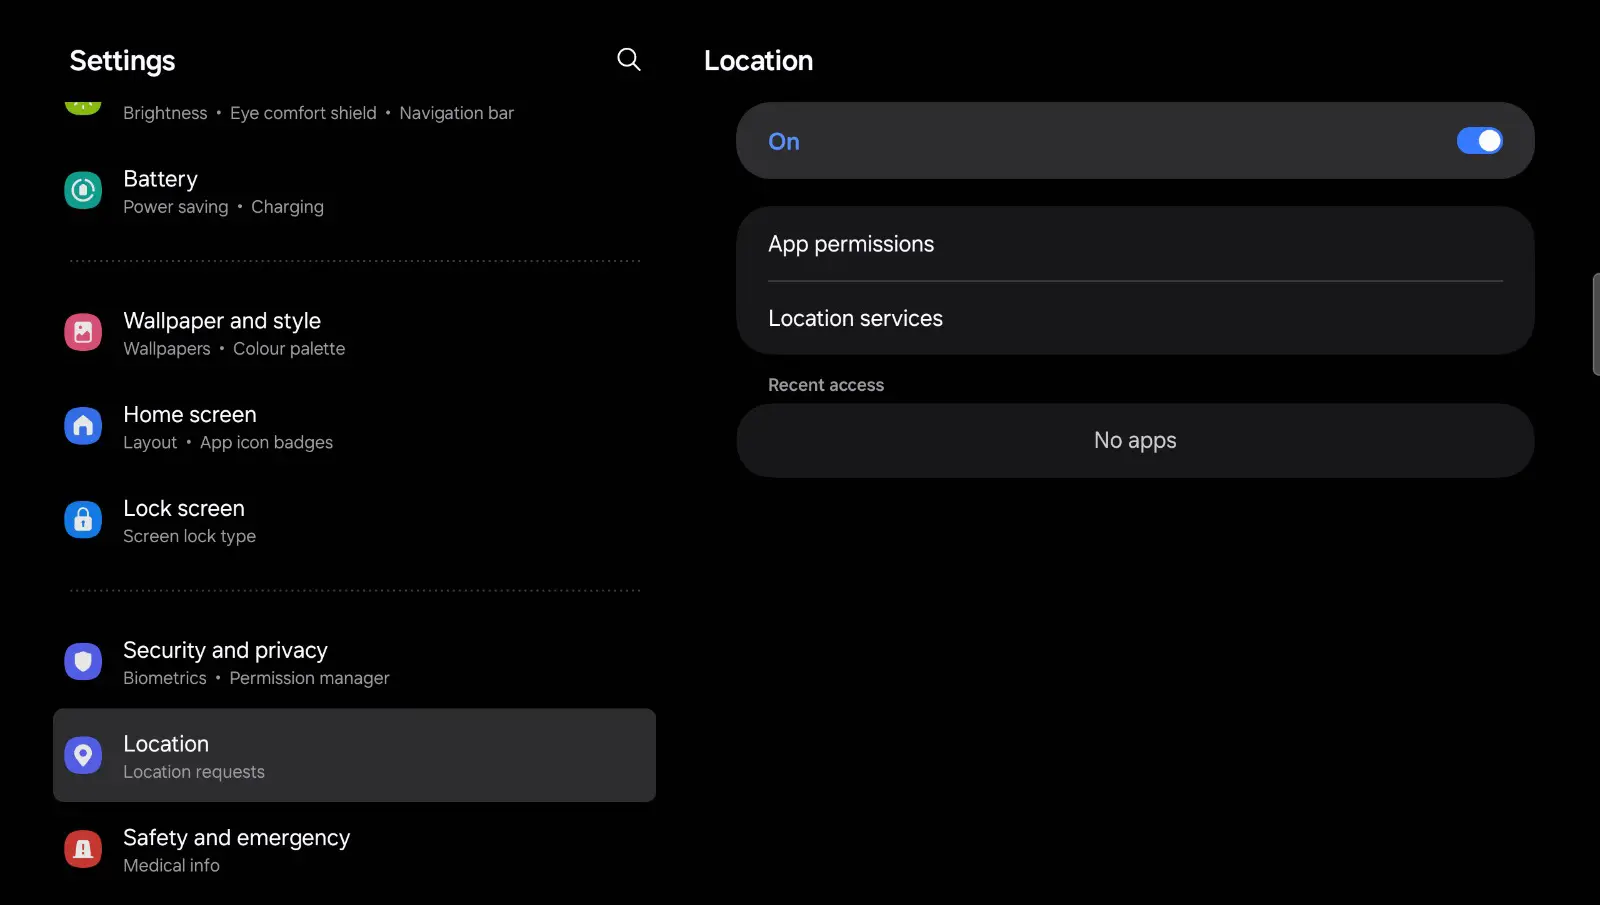
Open the device settings.
Go to Location Settings. (Scroll down and tap on Location)
Turn on Location Services. If Location is off, tap the switch to turn it on.
2- Enable Precise Location for an App
Open App Permissions:
- Go to Settings > Apps (or Apps and notifications, depending on your Android version).
- Find the app to which you want to grant location permissions and tap on it.
Open Permissions.
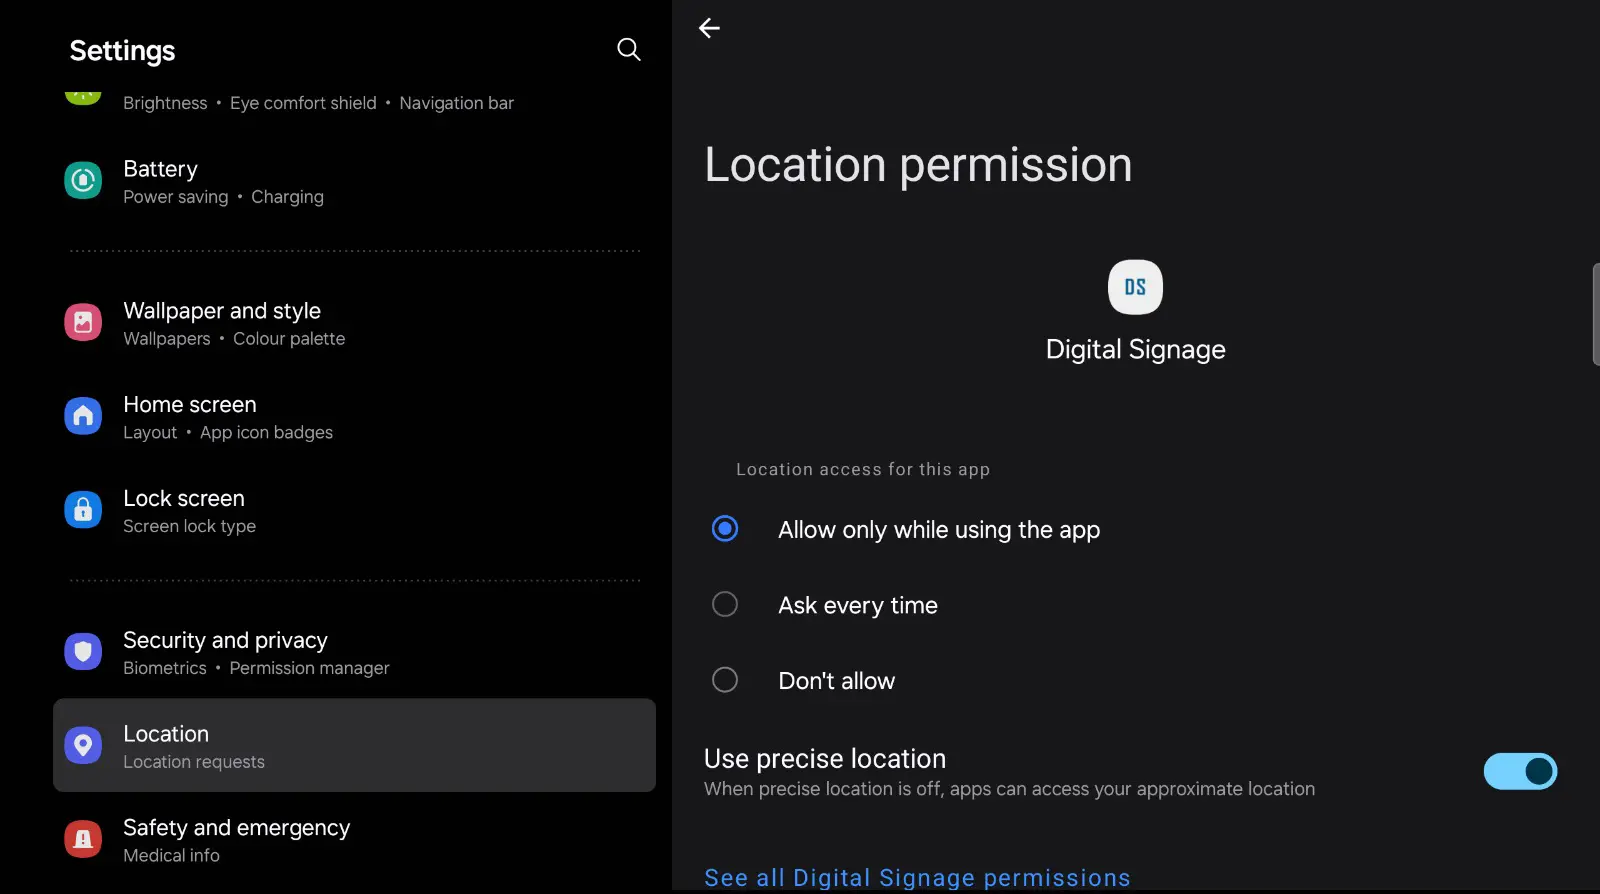
Allow Location Access:
- In the list of permissions, tap on Location.
- Choose Allow all the time or Allow only while using the app, depending on your app’s needs.
Enable Precise Location:
- Ensure that Use precise location is enabled (it allows the app to access GPS data). You will see a toggle next to “Use precise location”; ensure it’s turned on.
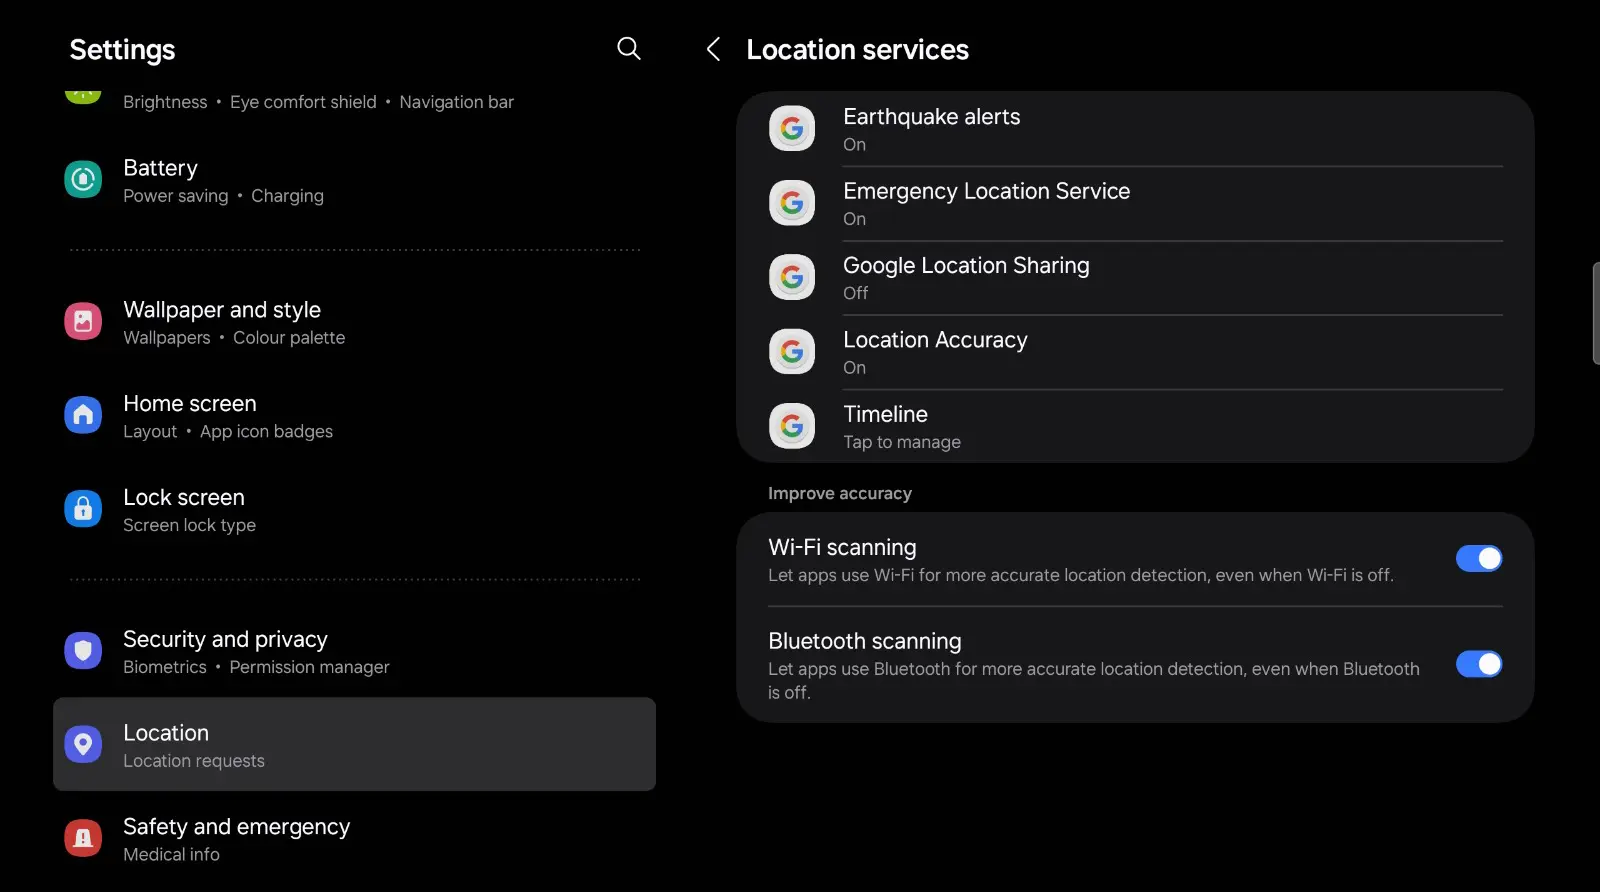
3- Check GPS Settings
High Accuracy Mode:
- Go back to Settings > Location.
- Tap on Location Mode or Advanced (depending on your Android version), and select High accuracy. This will use GPS, Wi-Fi, and mobile networks for location detection.
After setting up these steps, the app should be able to access GPS data from a precise location.
After configuring the location services and permissions on your digital signage device, log in to the CMS Portal and follow the below steps:
Step 2: Define Zones
A zone is a geographic area assigned to a playlist in a channel. It specifies the content that plays when a screen is located in that designated area.
- Go to the PLAYLISTS page.
- Navigate to the CHANNELS tab.
- Click on ZONES tab under Channels.
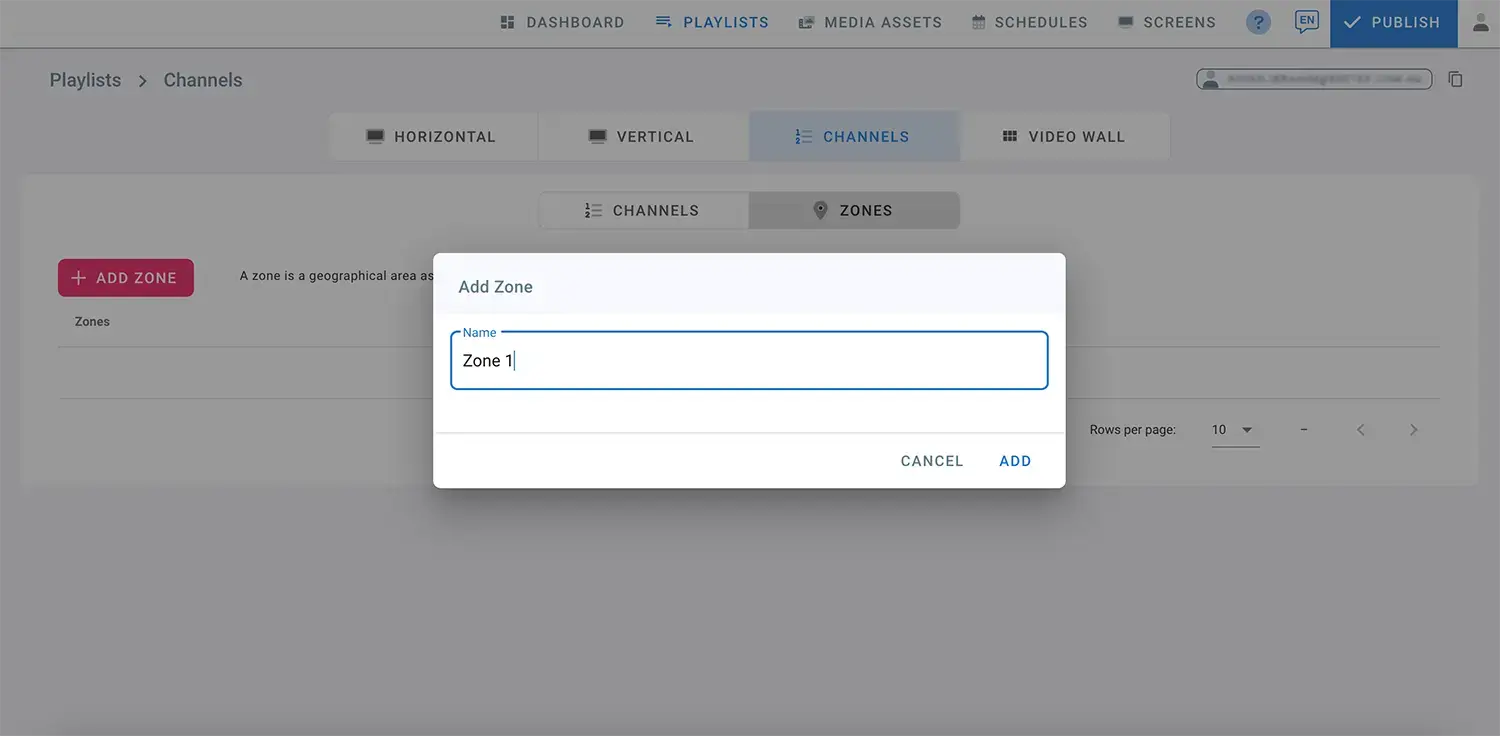
- Click on ADD ZONE.
- Enter the name of the zone, then click ADD.
Define the geographic zone on the map where content should change by searching for regions and zooming in or out as needed. Click and hold the mouse to navigate the map, and use the Toggle Button in the top right corner for a fullscreen view.
A zone is defined by drawing a polygon on the map. To define the zone, click on the map to set a start point. Move the mouse to draw the lines of the desired area, then return to the starting point to complete the zone definition. Below is an example of a defined zone.

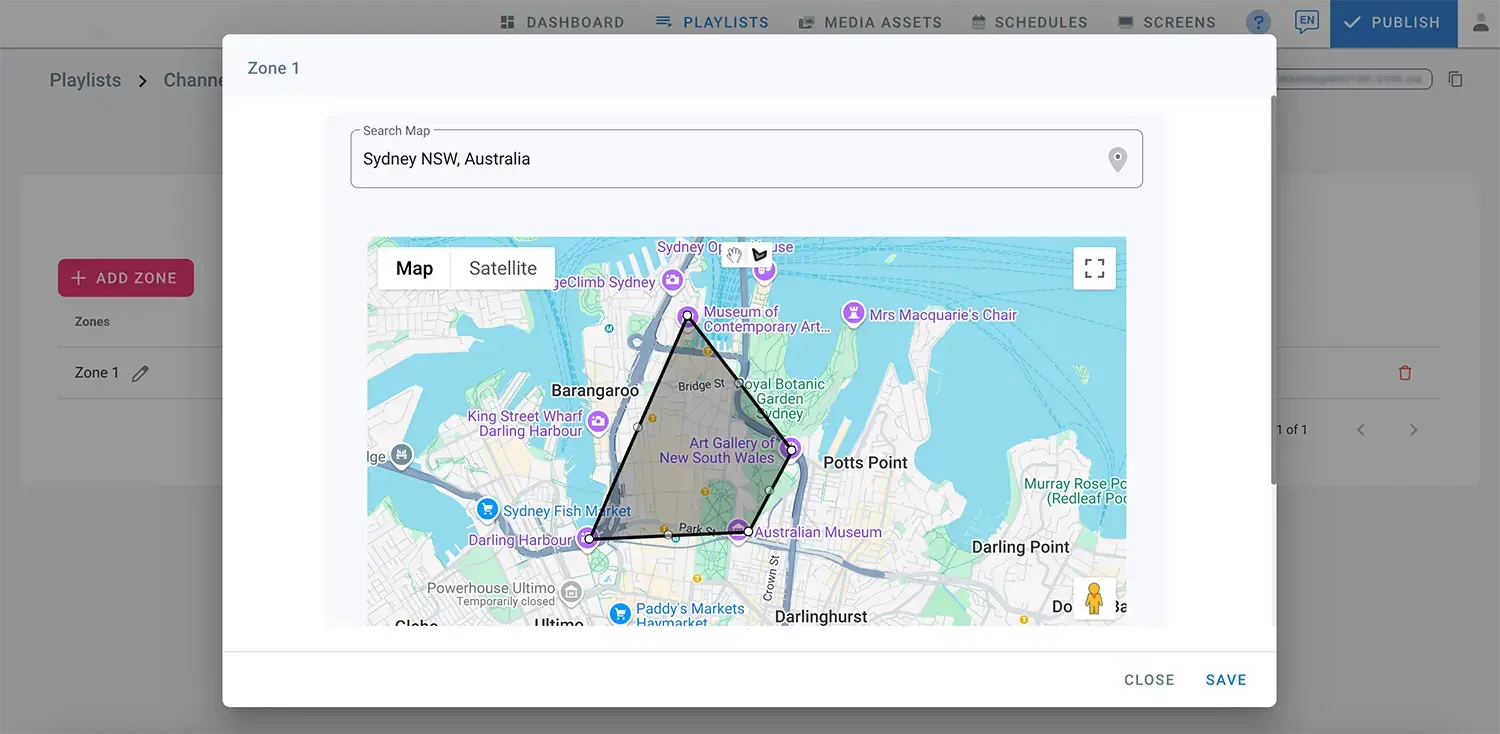
- Click on SAVE.
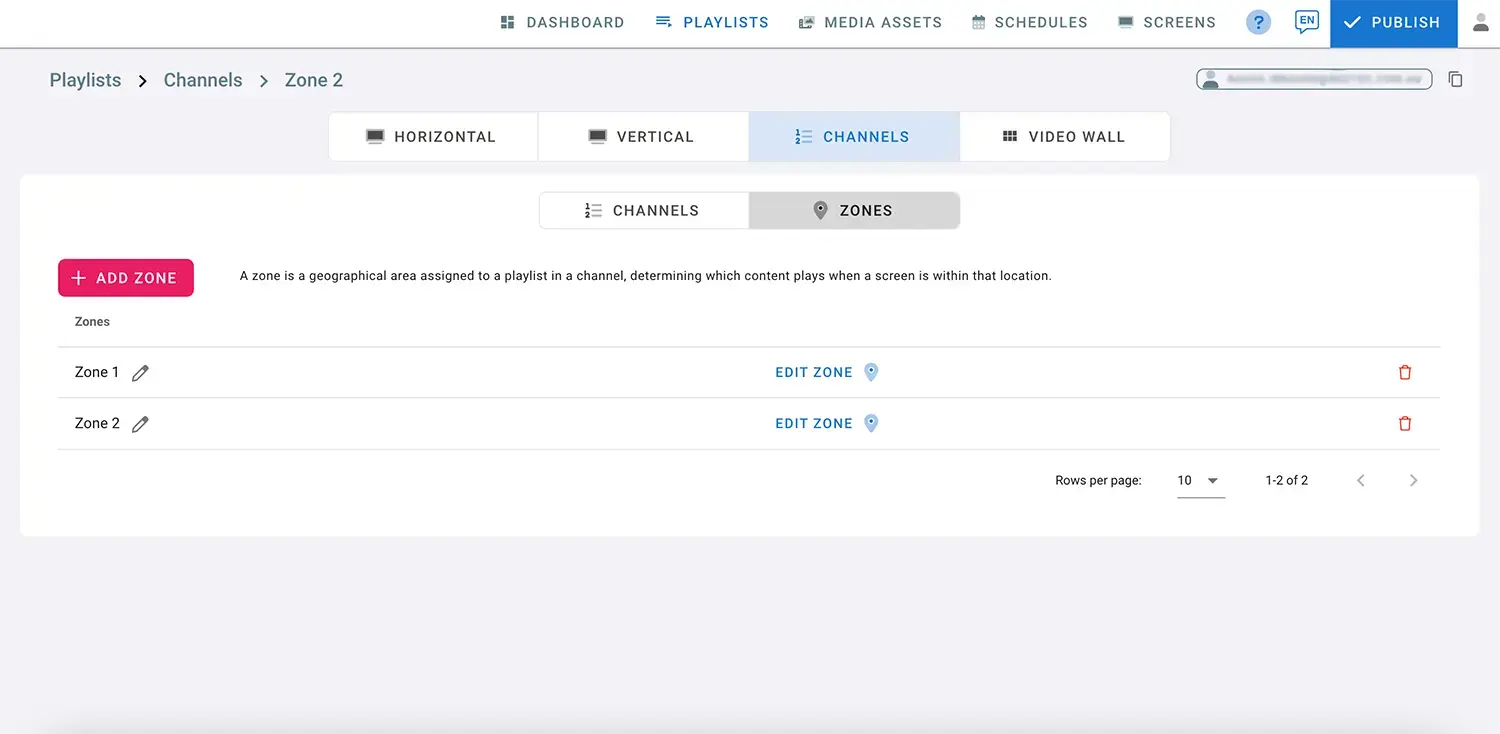
- Add more zones as needed.
Step 3: Create a Channel of Playlists
Set up your playlists and create a channel for these playlists.
- Go to HORIZONTAL or VERTICAL tabs to add playlists, depending on the type of screens used. For more info on creating a playlist, you can refer to the PLAYLIST page.
- Once you finish creating playlists, return to the CHANNELS tab.
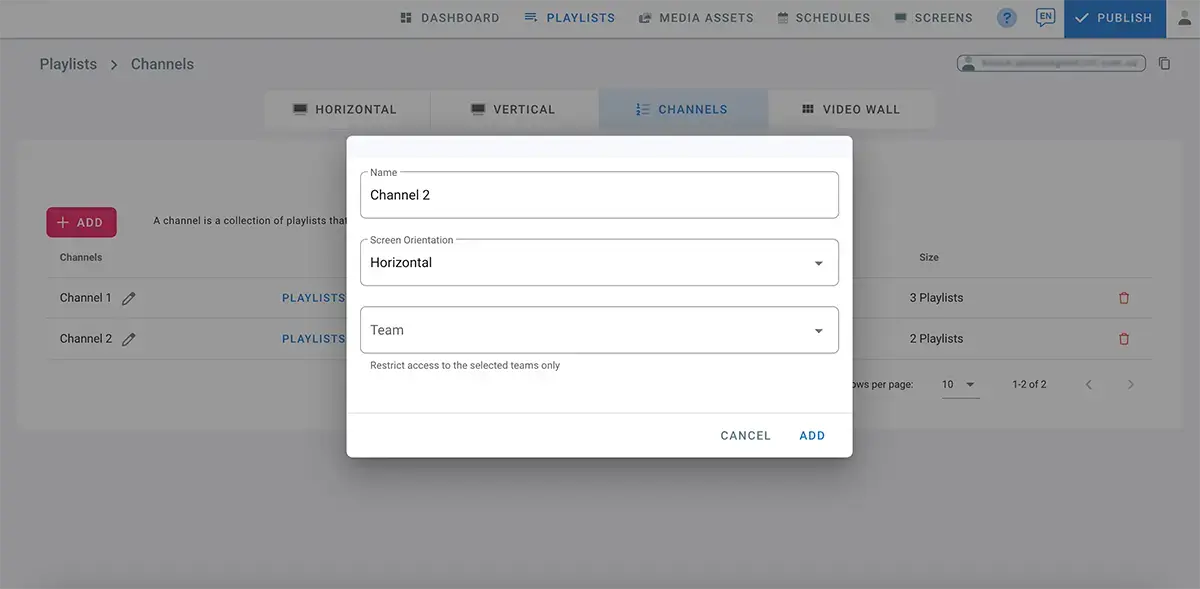
- In the Channels sub-section, click on ADD to create a channel of the playlists added previously. For more info on creating a channel, refer to the CHANNELS page.
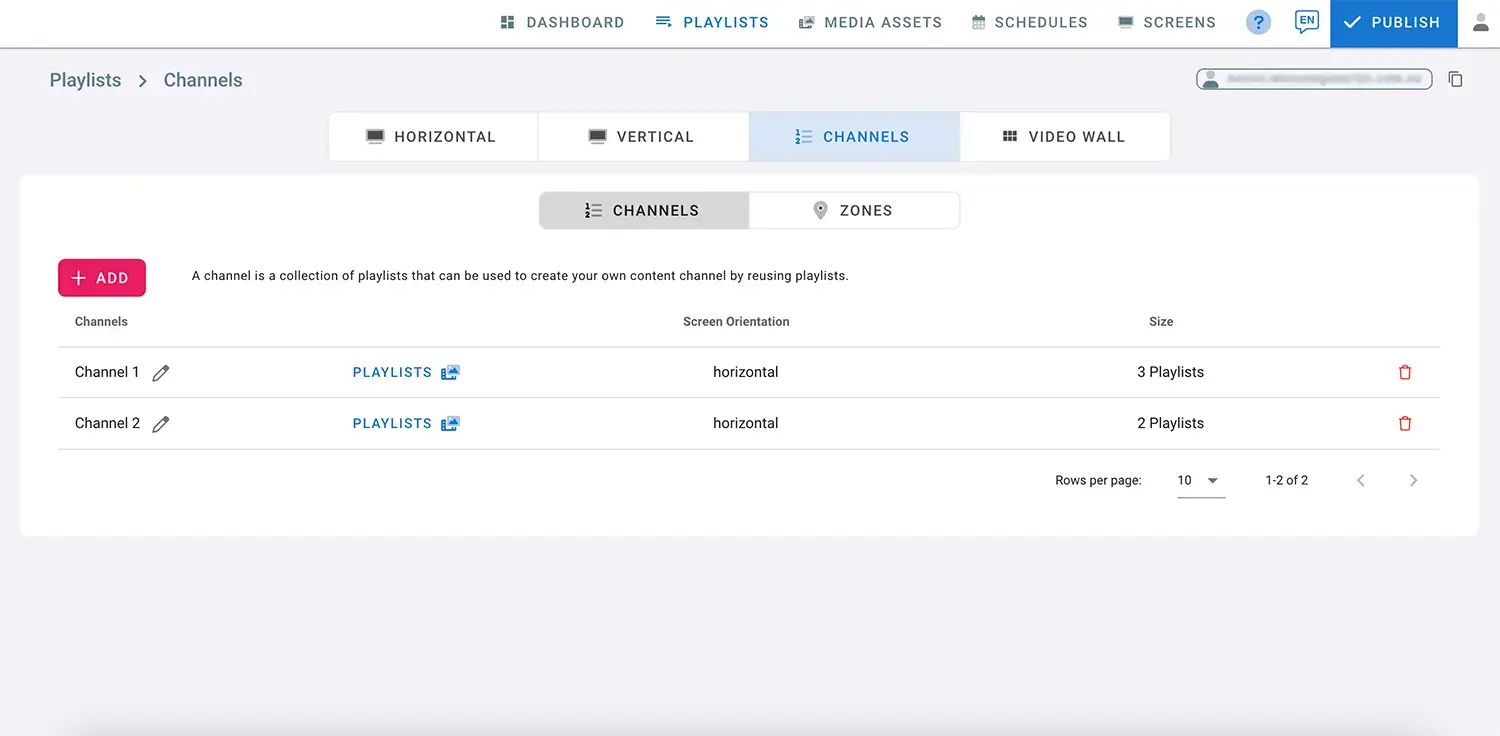
- Name your channel, and choose a screen orientation, horizontal or vertical, from the drop-down list.
- Choose a team to restrict channel access exclusively to that team. Leave it empty if no restrictions are needed.
- Click on ADD.
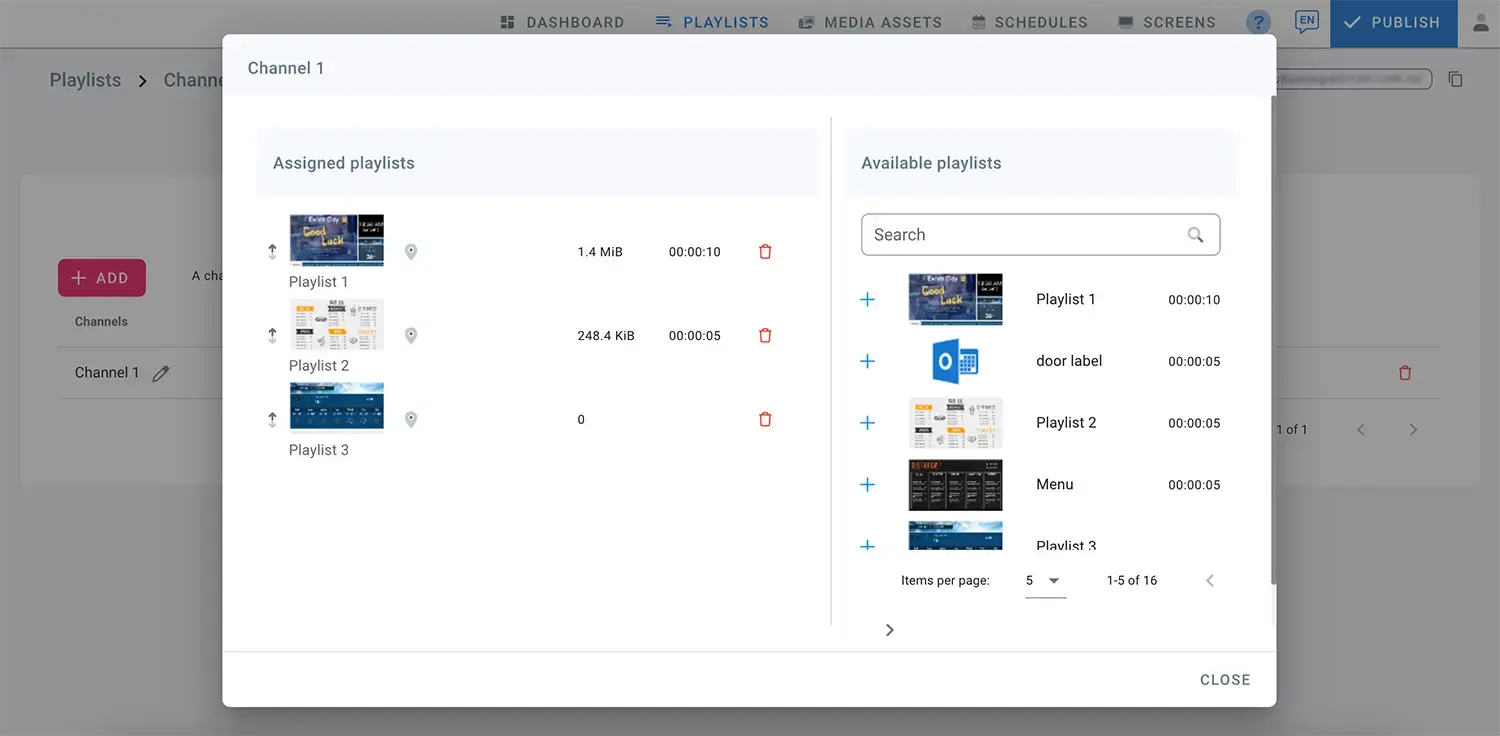
- Click on the + to add playlists to the channel.
Step 4: Assign Zones to Playlists
Link each playlist under channels to its corresponding geographical zone so the content updates according to location.
- Click on the location icon next to each playlist to assign it to a zone.
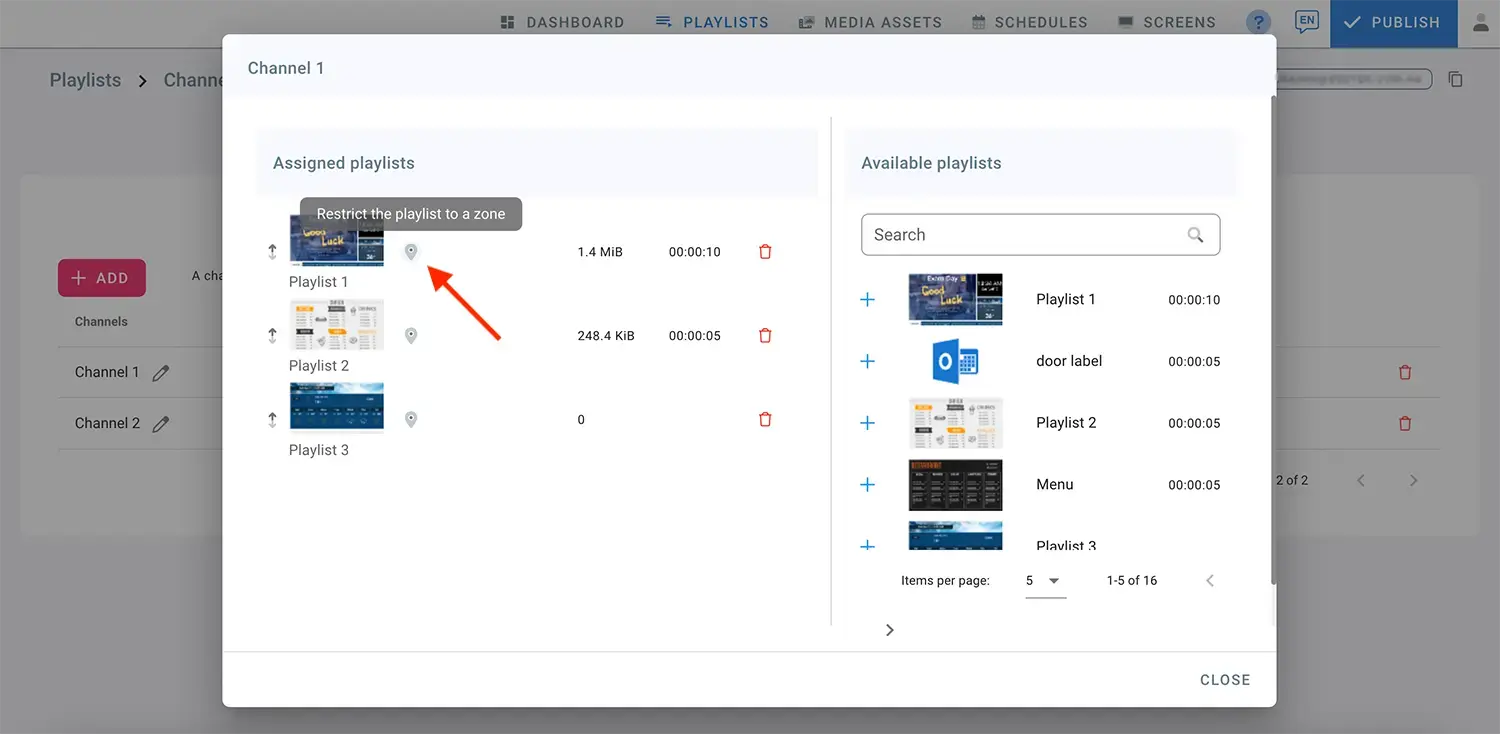
- Select a zone name from the list to restrict the playlist to that location.


- Click on CLOSE after assigning zones to the playlists.
Step 5: Assign Channel to Screens
Navigate to the SCREENS page. (For more details on adding a screen, see the SCREENS page).
Click on Media Source Type next to the screen name.
Select Channels as the source type.
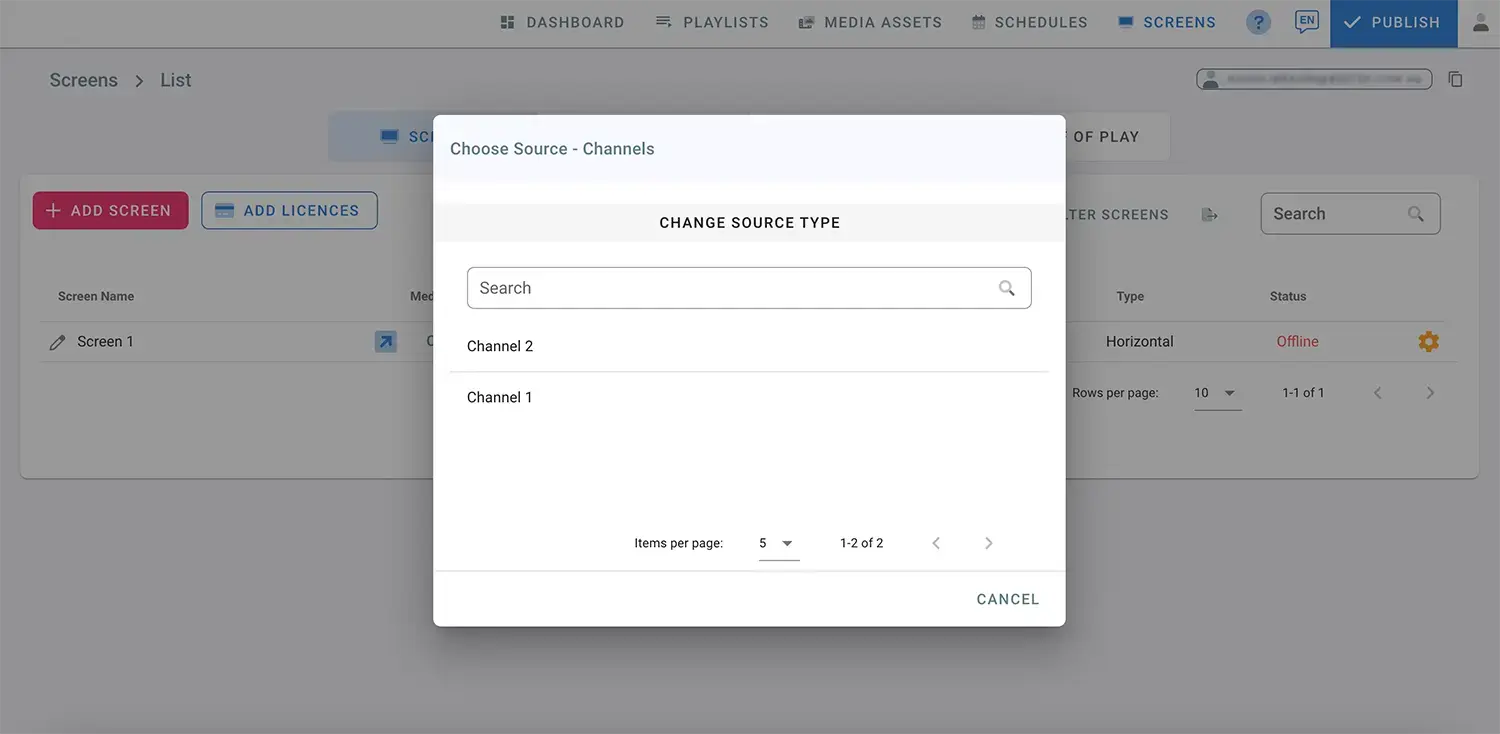
Choose the desired channel to assign it to your screen.
Click Publish to send the updates to the screen.
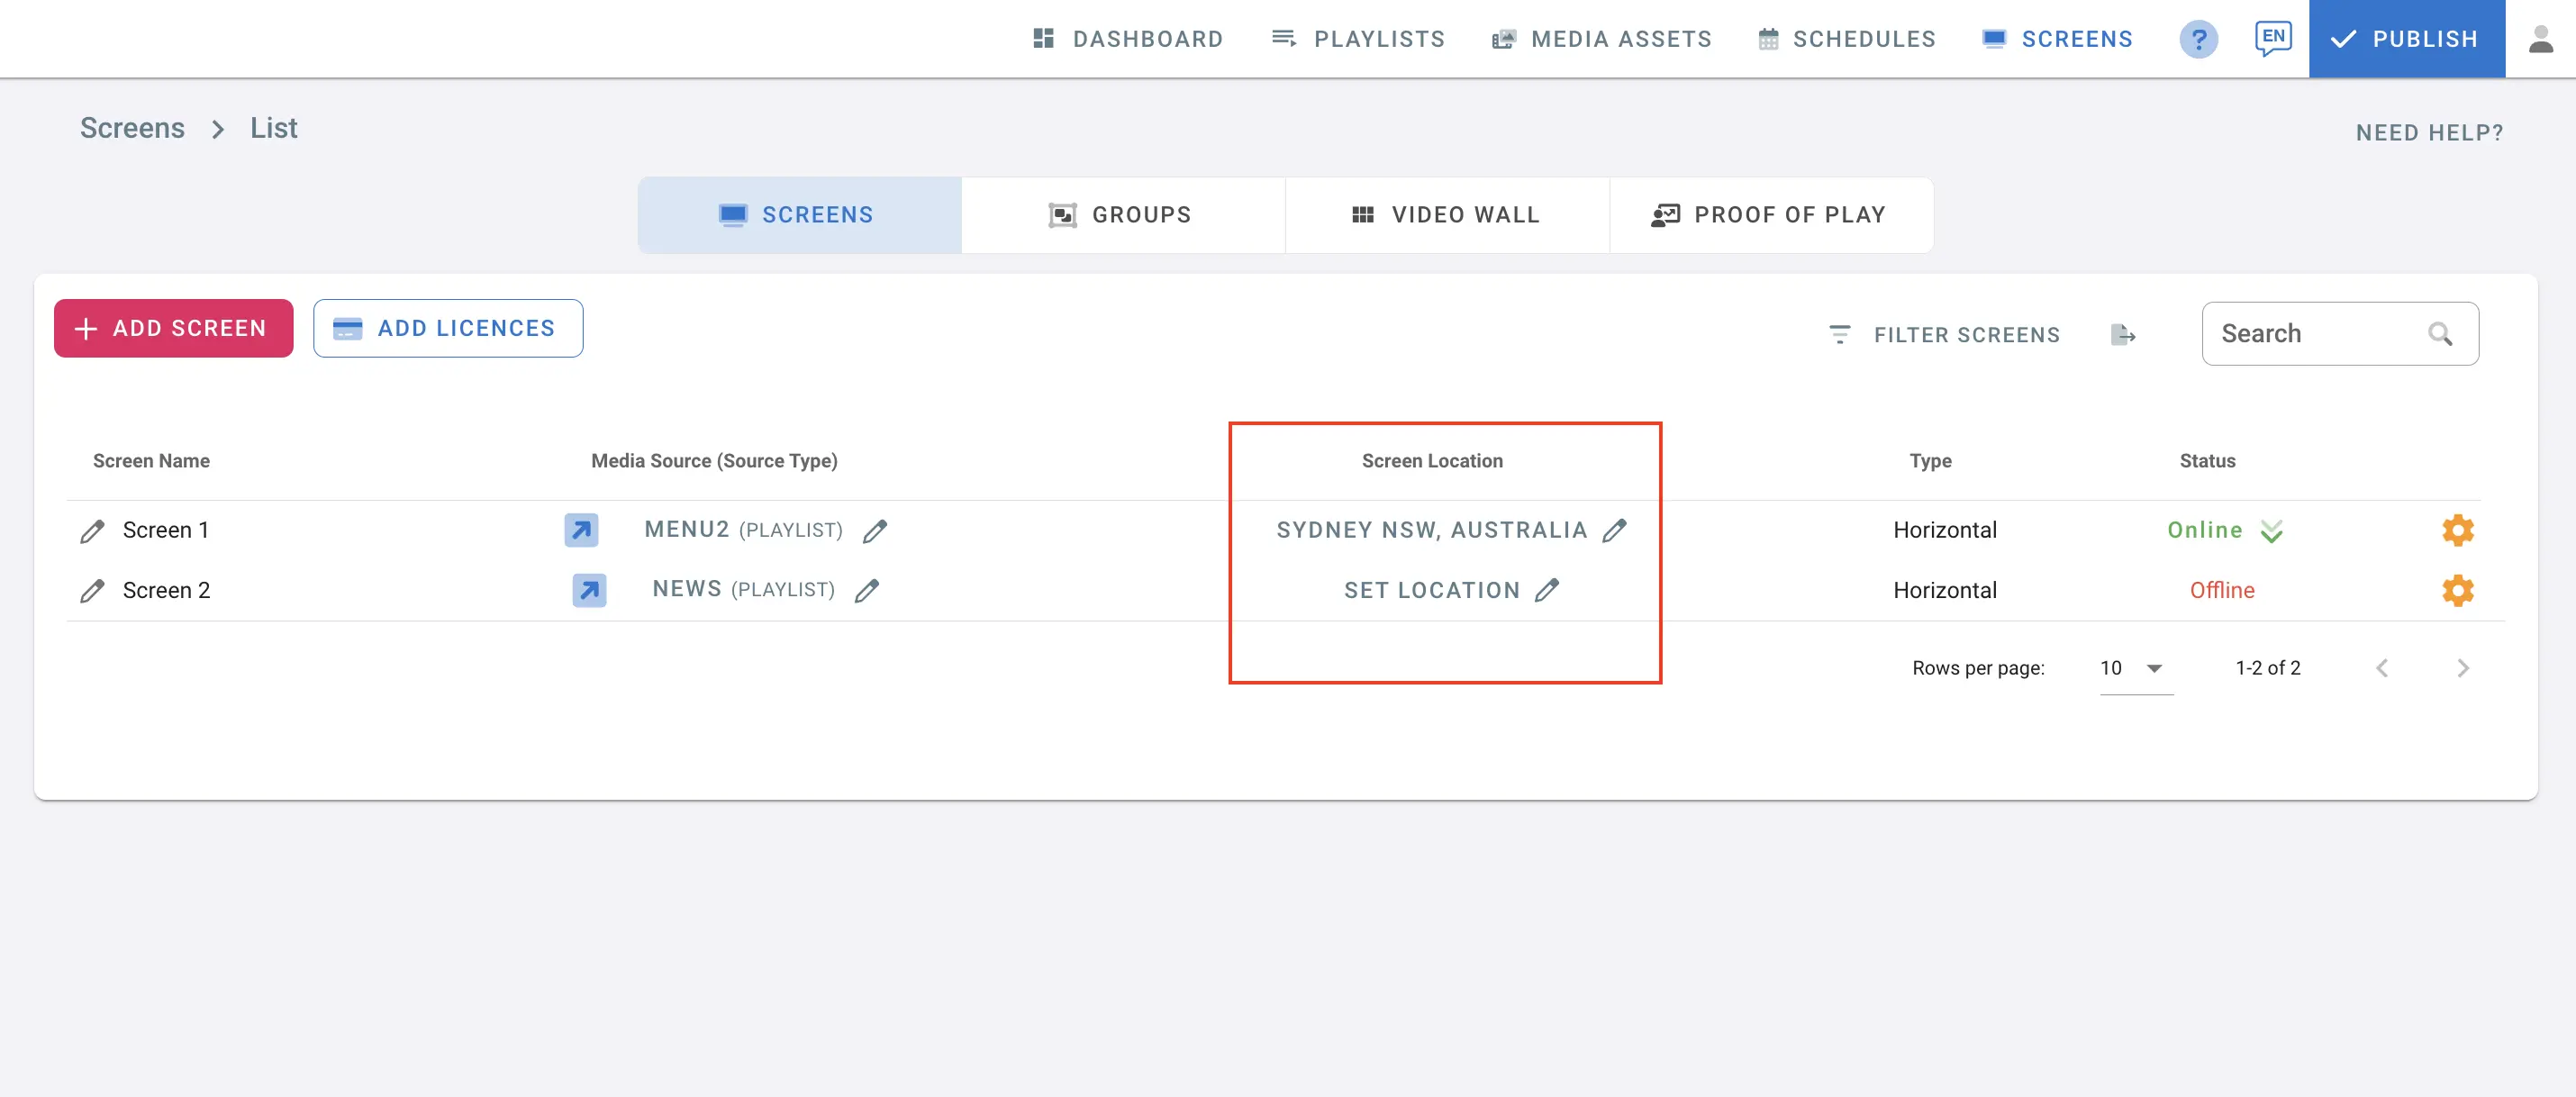
Step 6: Set Screen Location
Now, you must enable the screen location feature.
Go to the SCREENS tab.
Under the Screen Location column next to the screen name, click on SET LOCATION.
- Check " Enable auto-update location using the device’s GPS".
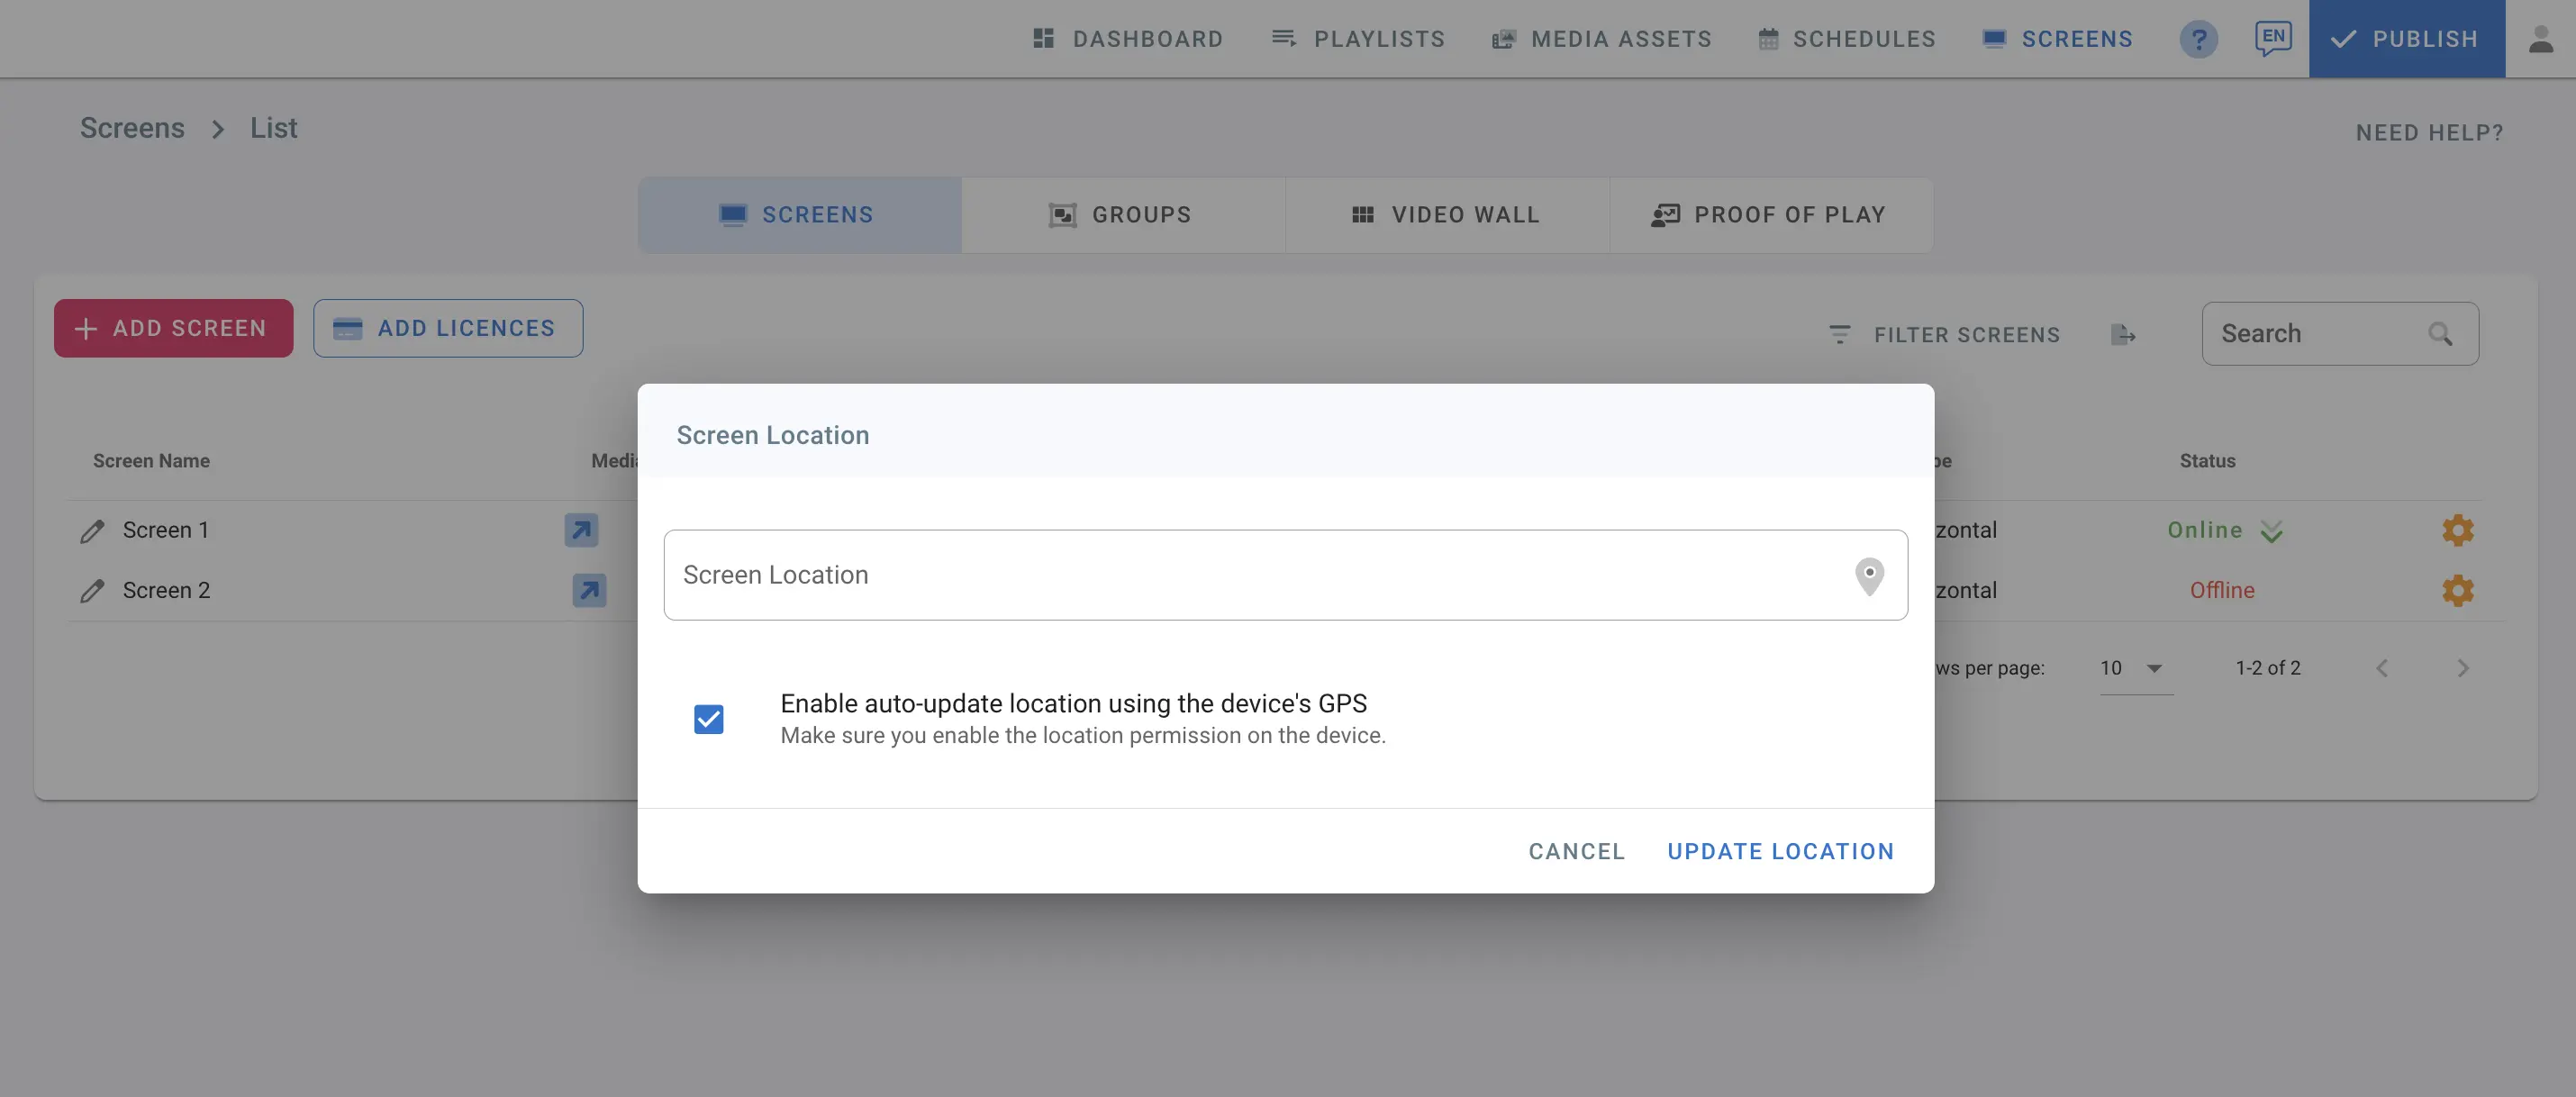
- Click on UPDATE LOCATION.
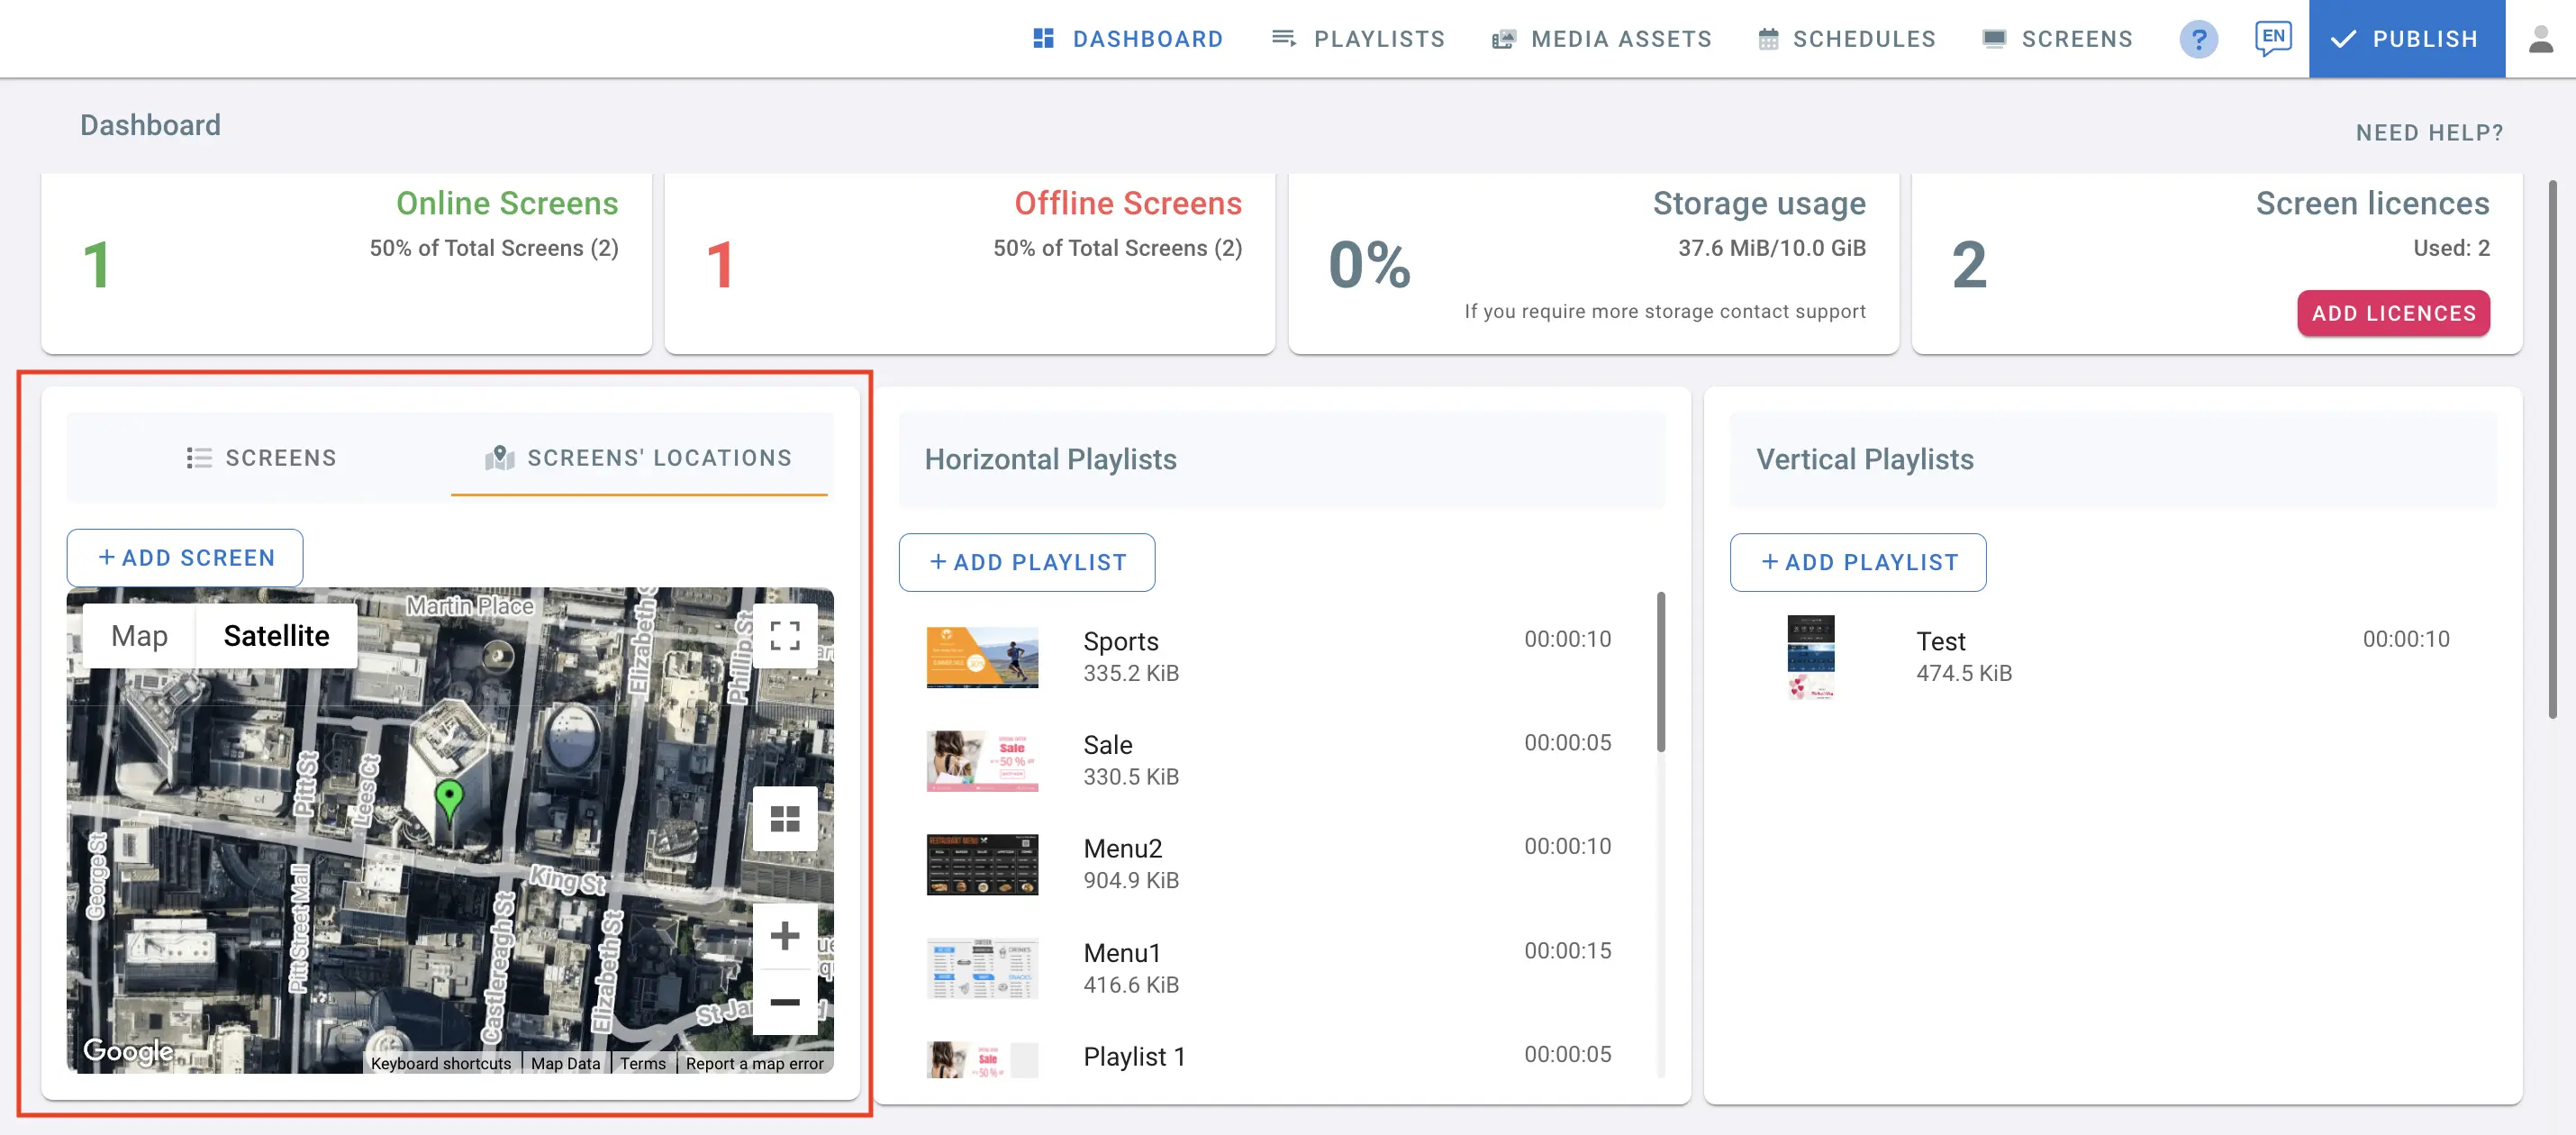
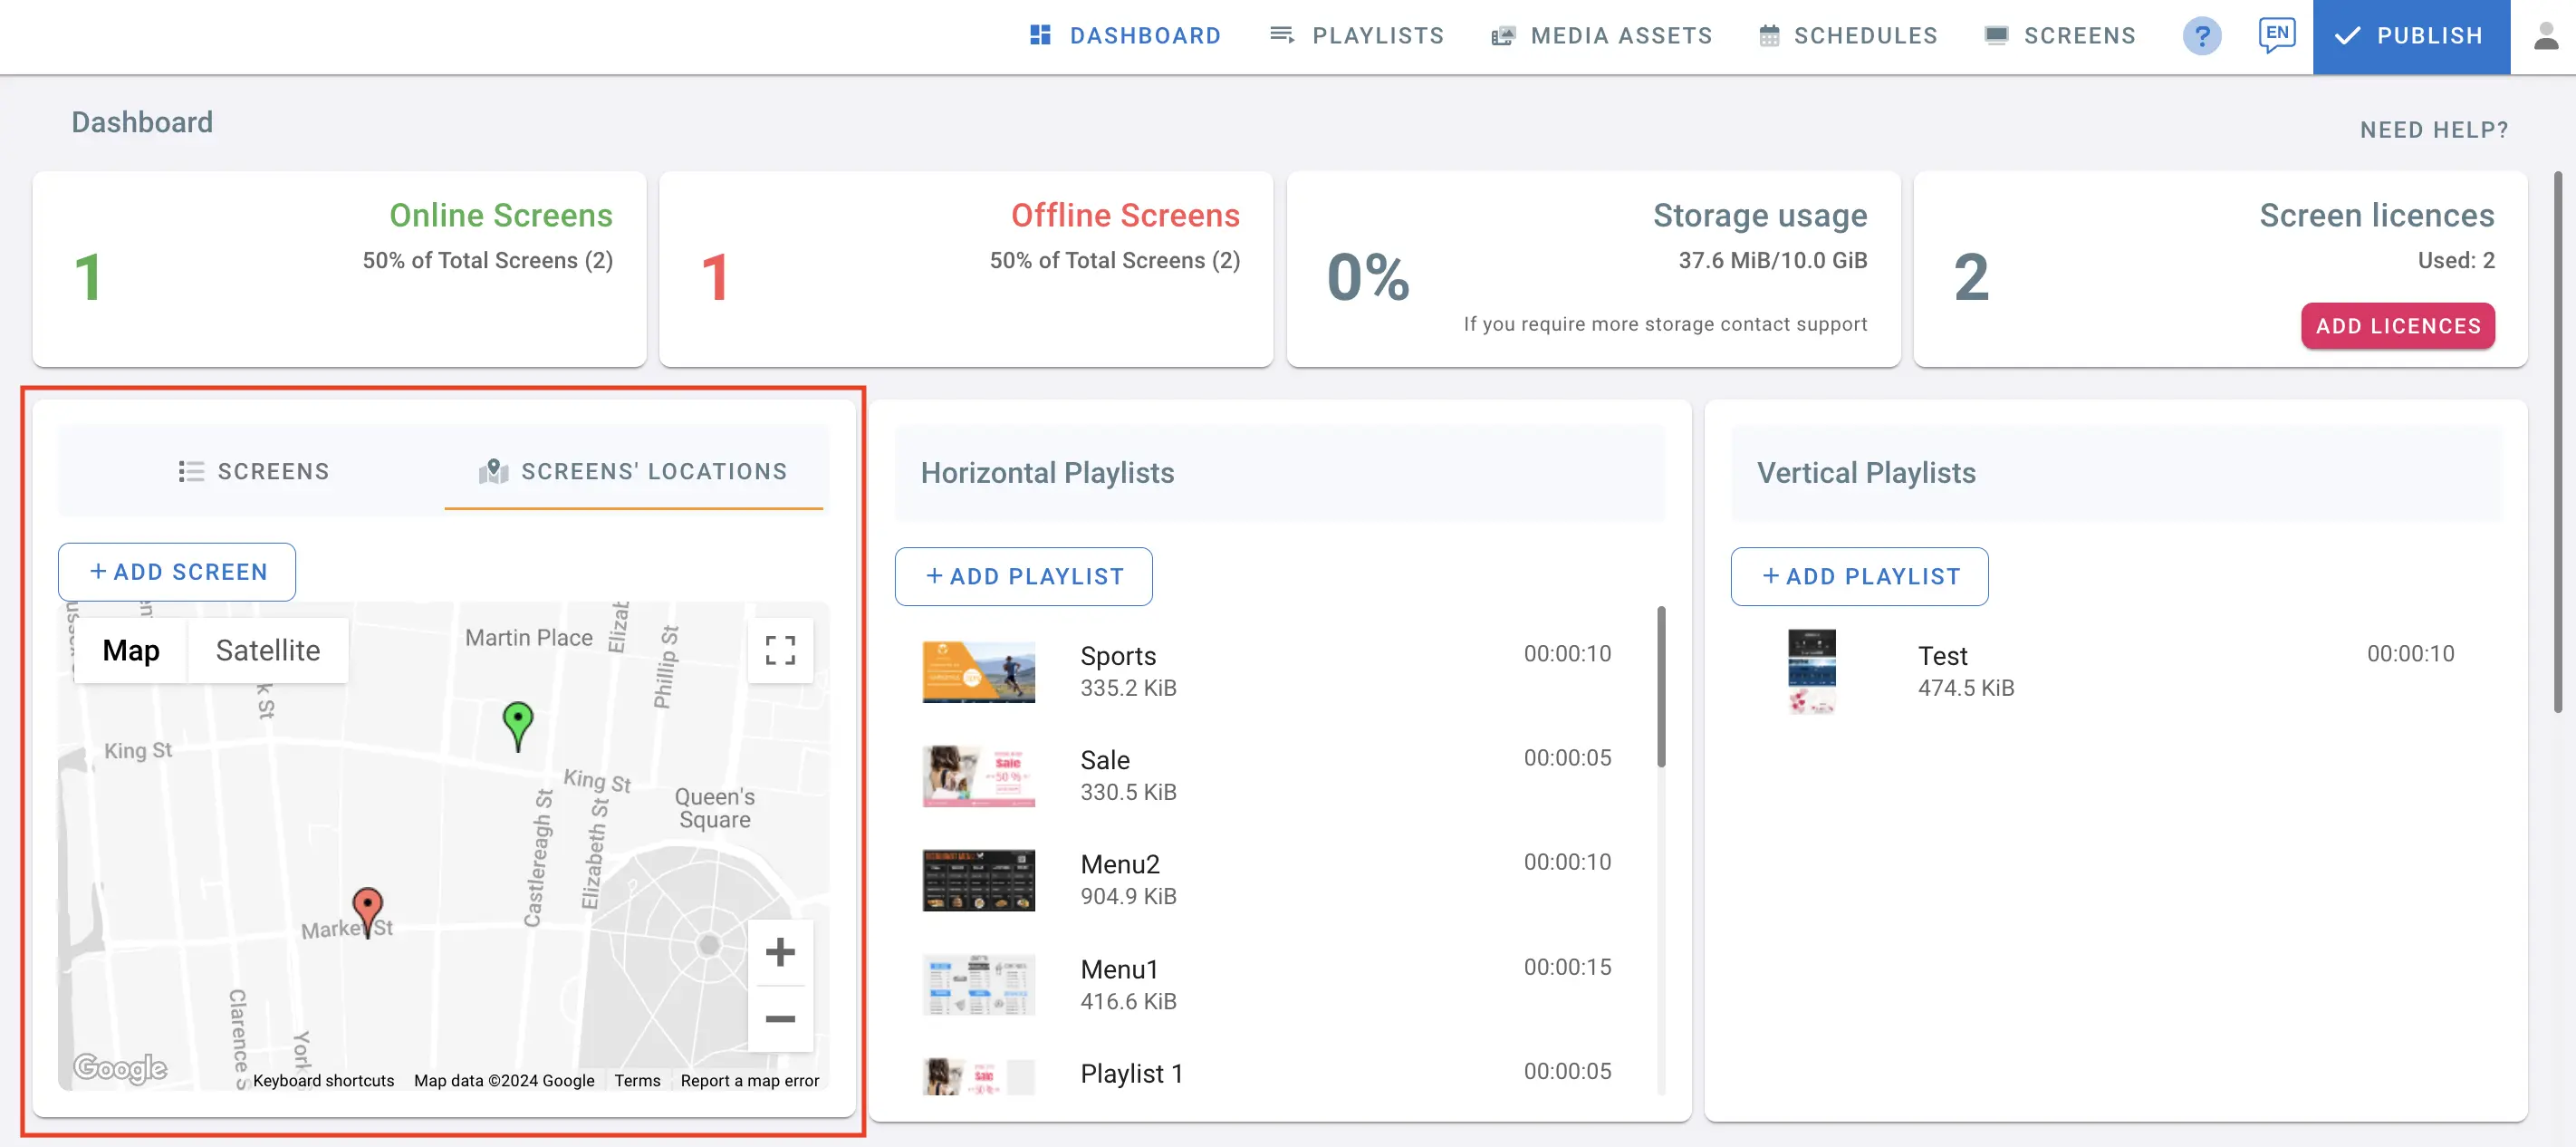
- Go back on the DASHBOARD tab.
- Click on SCREEN’S LOCATIONS, on the left side of the dashboard.
Now, you can see the locations of all your active screens, both online or offline, displayed on the map. This feature displays your screen’s live location in real-time, allowing you to see location changes instantly. When the screen moves within the defined zones, the content will automatically switch playlists, based on the defined geolocations.
Online screens are marked with green pins, while offline screens with red pins.
You can click the Toggle in the top right corner for a fullscreen view.
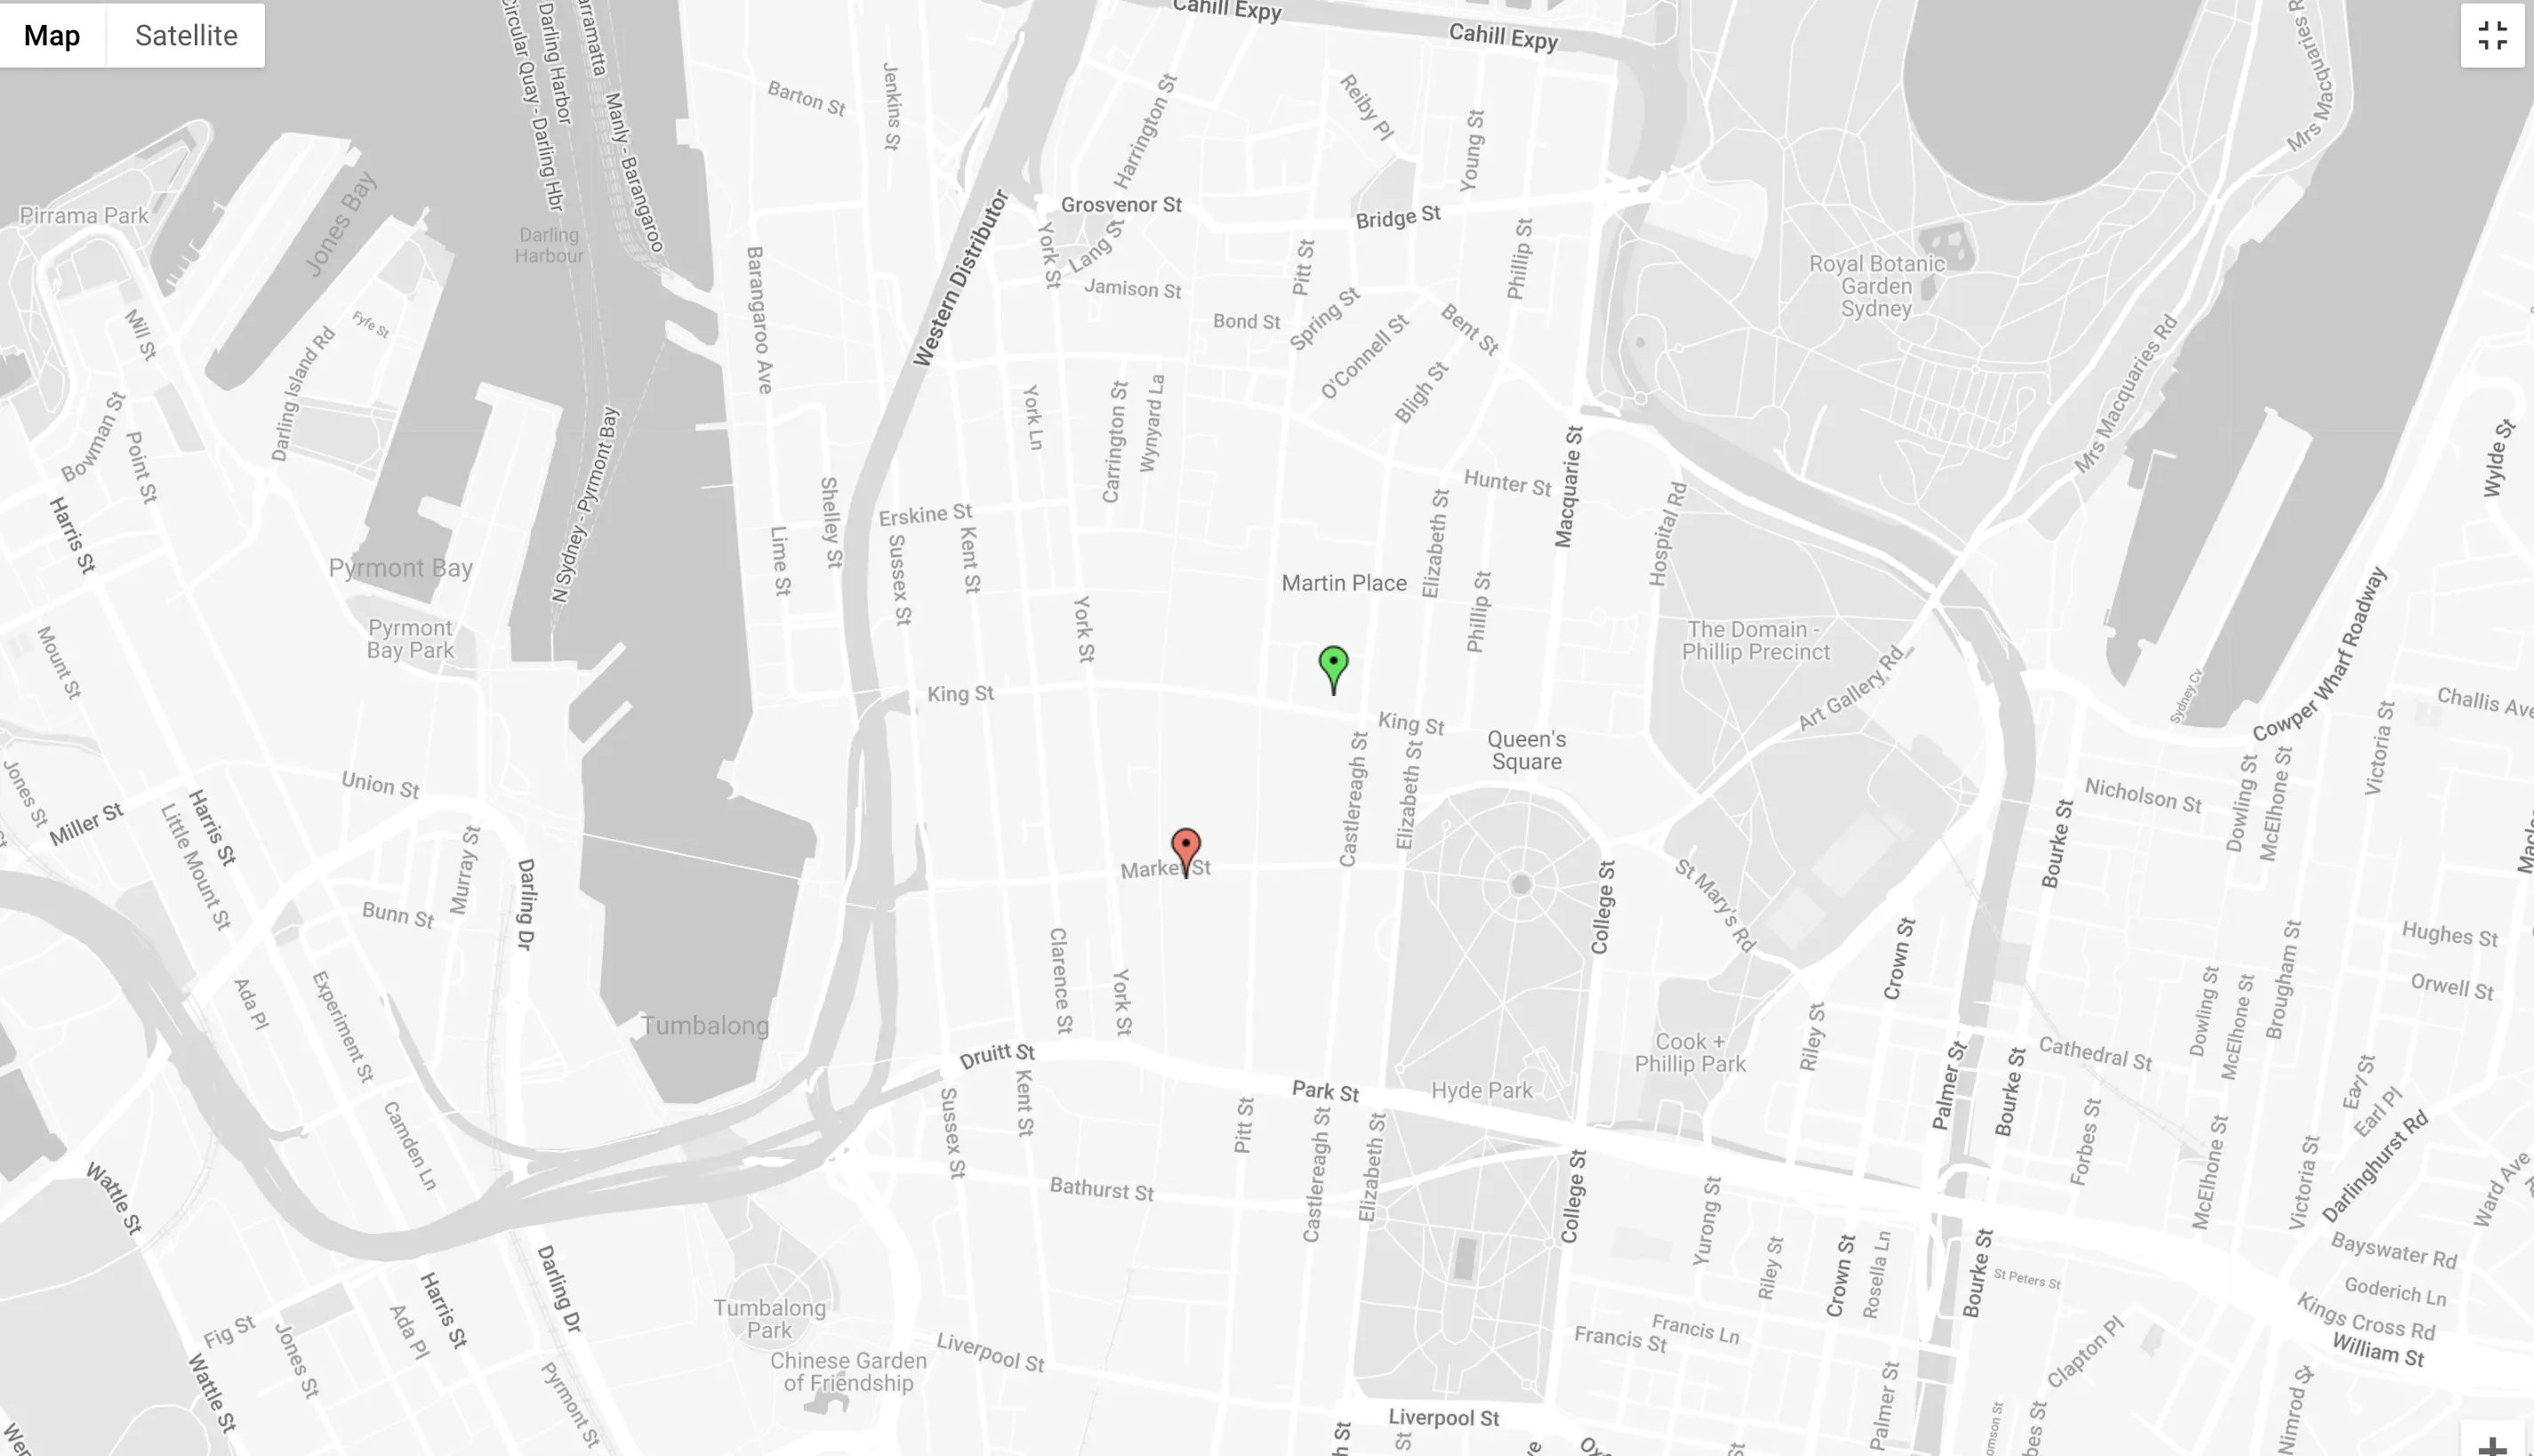
You can also switch to Satellite view.