- Open the management console
- Click on Playlists
- Open a playlist
- Click on a layer where you will add a template
- If the layer has no media, the apps dialog will open. Otherwise, click on Add New
- Click on Add from Templates
- Click on a template category
- Click on a template
- To Edit the template, Click on Open Editor
Template Editor
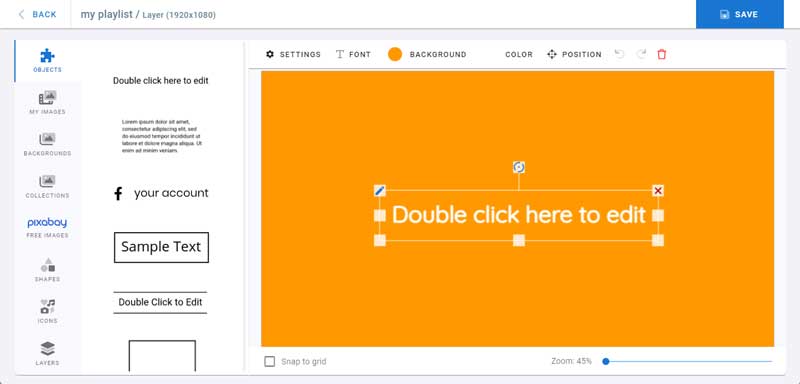
- Click on the text to select it
- the top bar have the object controls
Settings
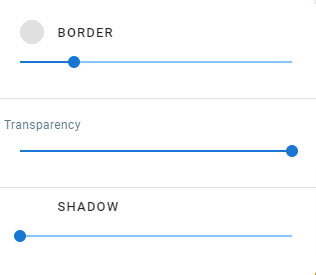
Border: click on the border color to open color chooser. Control the border size using the seek bar.
Transparency: control the transparency of the selected object.
Shadow: click on shadow color to open color chooser. Control the shadow size using the seek bar.
Font
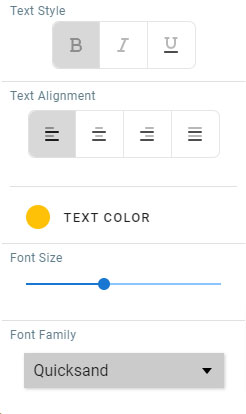
Control the text style, text alignment, text color, font size and font family for text based objects.
Background
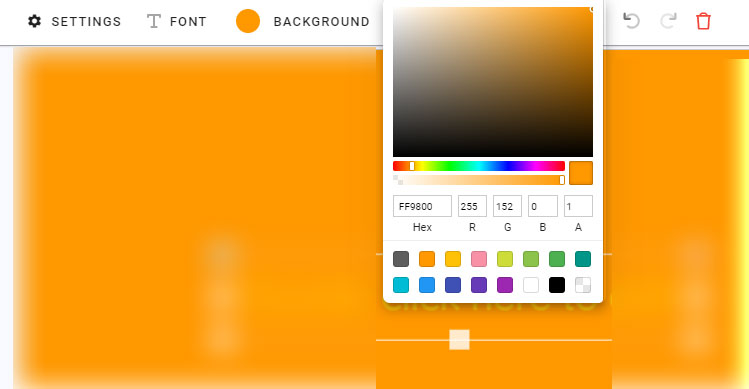
Click on Background and choose from the color picker to change the template background color
Color
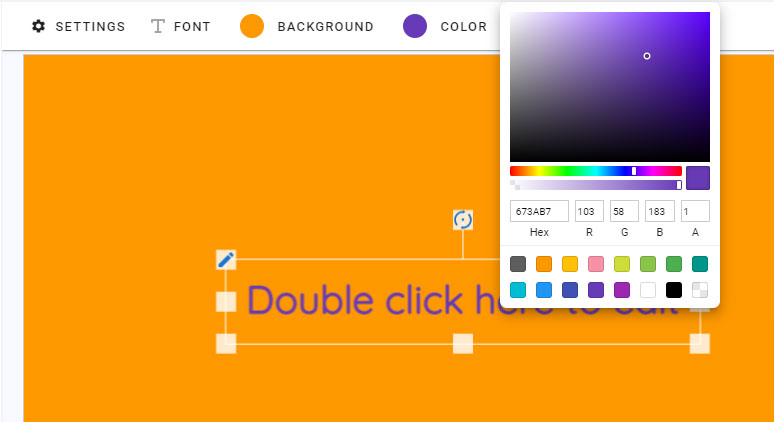
Click on Color and choose from the color picker to change the selected color foreground color
Position
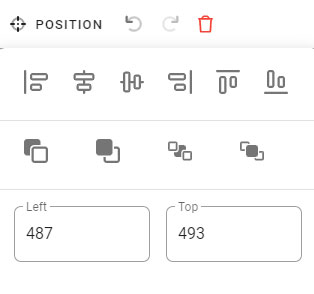
The position controls are respectively as follow:
Align the object to: left, center vertically, center horizontally, right, top, bottom
Send Backward: send the object to the back by 1 step
Bring forward: bring the object to the front by 1 step
Send to Back: send the object behind all other objects
Bring to Front: bring the object on top of all other objects
Change the left and top position of the object
Objects can be moved by dragging and droppping them to another position. Or by using the arrow keys on the keyboard.
Other Controls
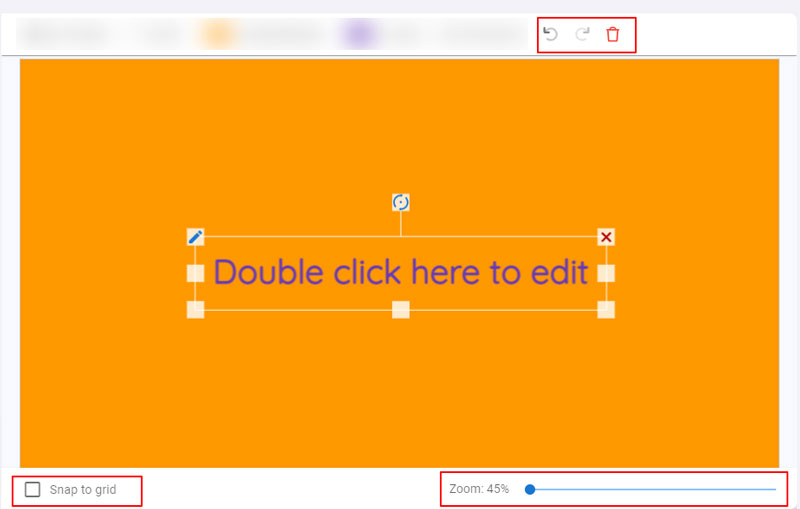
Undo, Redo: undo or redo the last action
Delete: Delete the selected object. Objects can also be deleted by pressing delete key on the keyboard
Snap to Grid: If checked, move the objects on a grid instead of freely moving them
Zoom: Put the cursor on a zone in the tempate and zoom in and out the template.
Objects
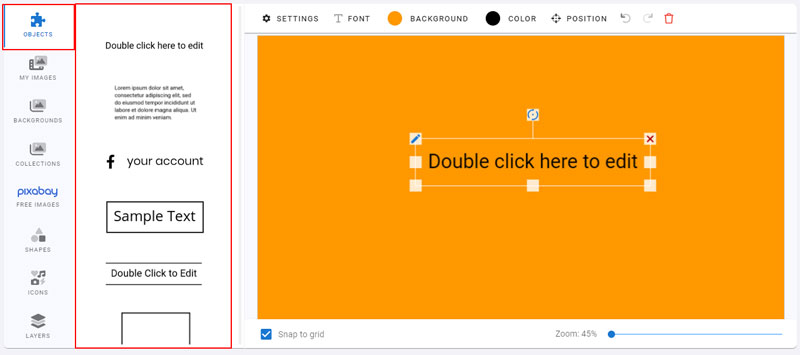
Click on an object to add it to the template.
Adding social media object

- Click on the object with facebook logo and your account text
- Type in the account name and choose the social media type
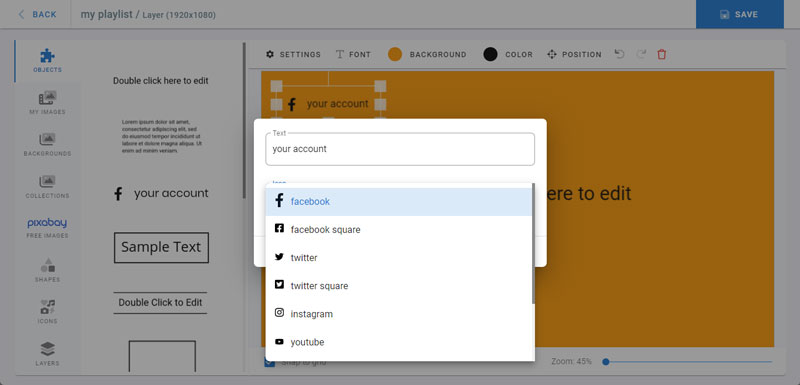
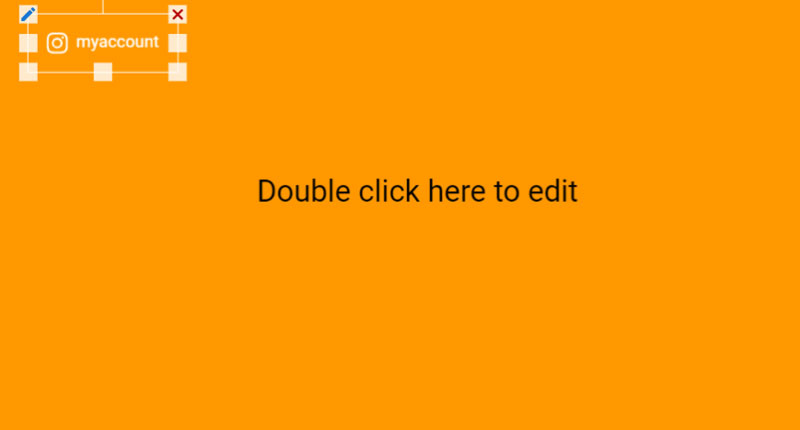
To edit the added object details, double click on it, it will reopen the above dialog.
Adding a menu object
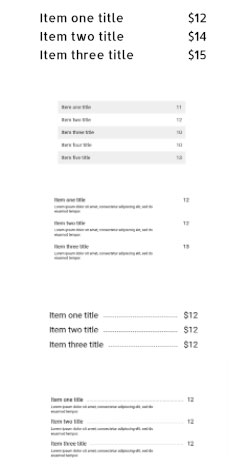
Scroll down in the objects list and click on one of the menu designs
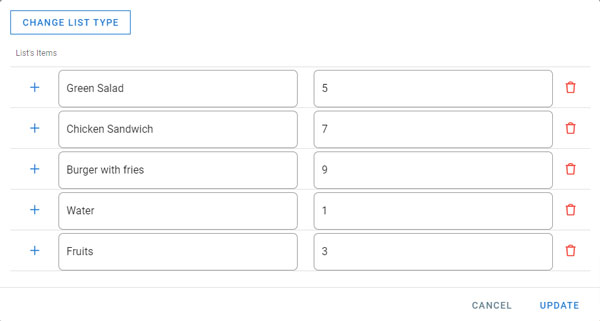
- Type in the values and description
- Click on the plus sign on the left to add more items
- Click on delete on the right to delete an item
- Click on Change List type to change the menu design
- Once done click on Update
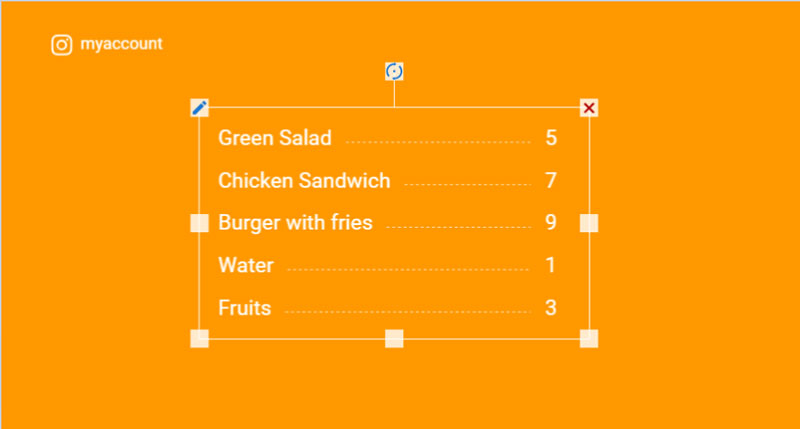
- Change the color, font, position and other controls of the added menu.
My Images
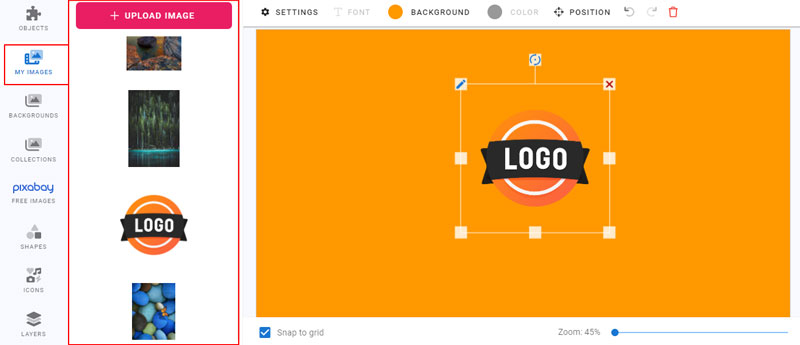
- Click on Upload Image to upload images from your PC, Dropbox, OneDrive or Facebook
- Images from the aseets can be used
- Click on an image from the list to add it to the template
Backgrounds
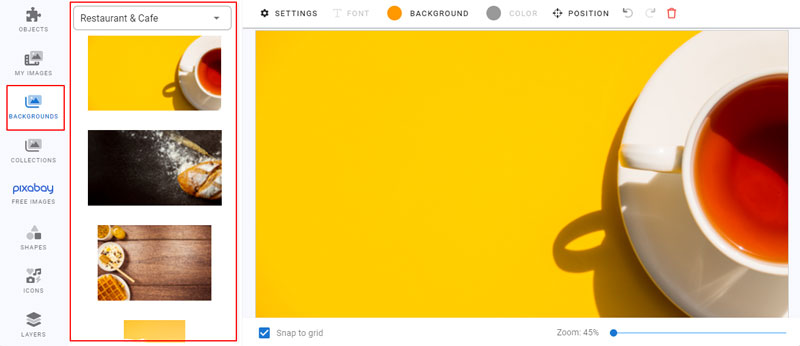
- Choose a background category from the drop down on top
- Click on a background to add it
- Resize it and move it in the template to fit
Collections

- Collections provide a built-in searchable image library
Pixabay
- Pixabay is a third-party searchable image library
Shapes
- Choose through different categories of shapes
- Shapes can be customized in size and color
Icons
- Search through transparent vector images
Layers
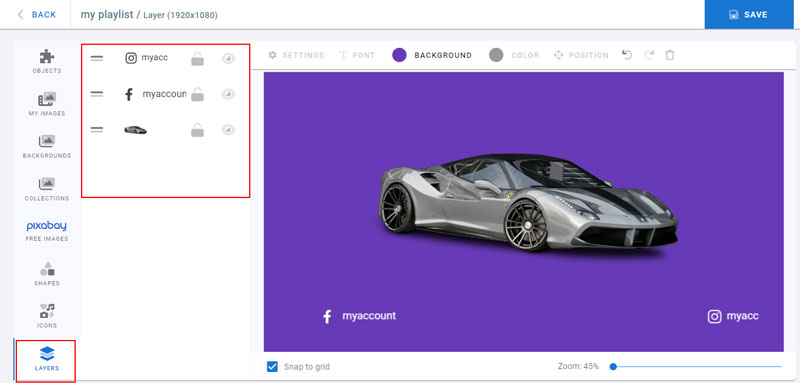
- Layers is the list of the objects added to the template
- Drag and drop layers up and down to bring forward or send backward
- The lock near each layer allows you to lock a layer from being modified, resized or moved
- The eye is used to hide/show the layer
Once the template design is ready, click on Save.
The template will be processed and saved as an image.
To edit it again, click on Open Editor.